From the Extend home page:
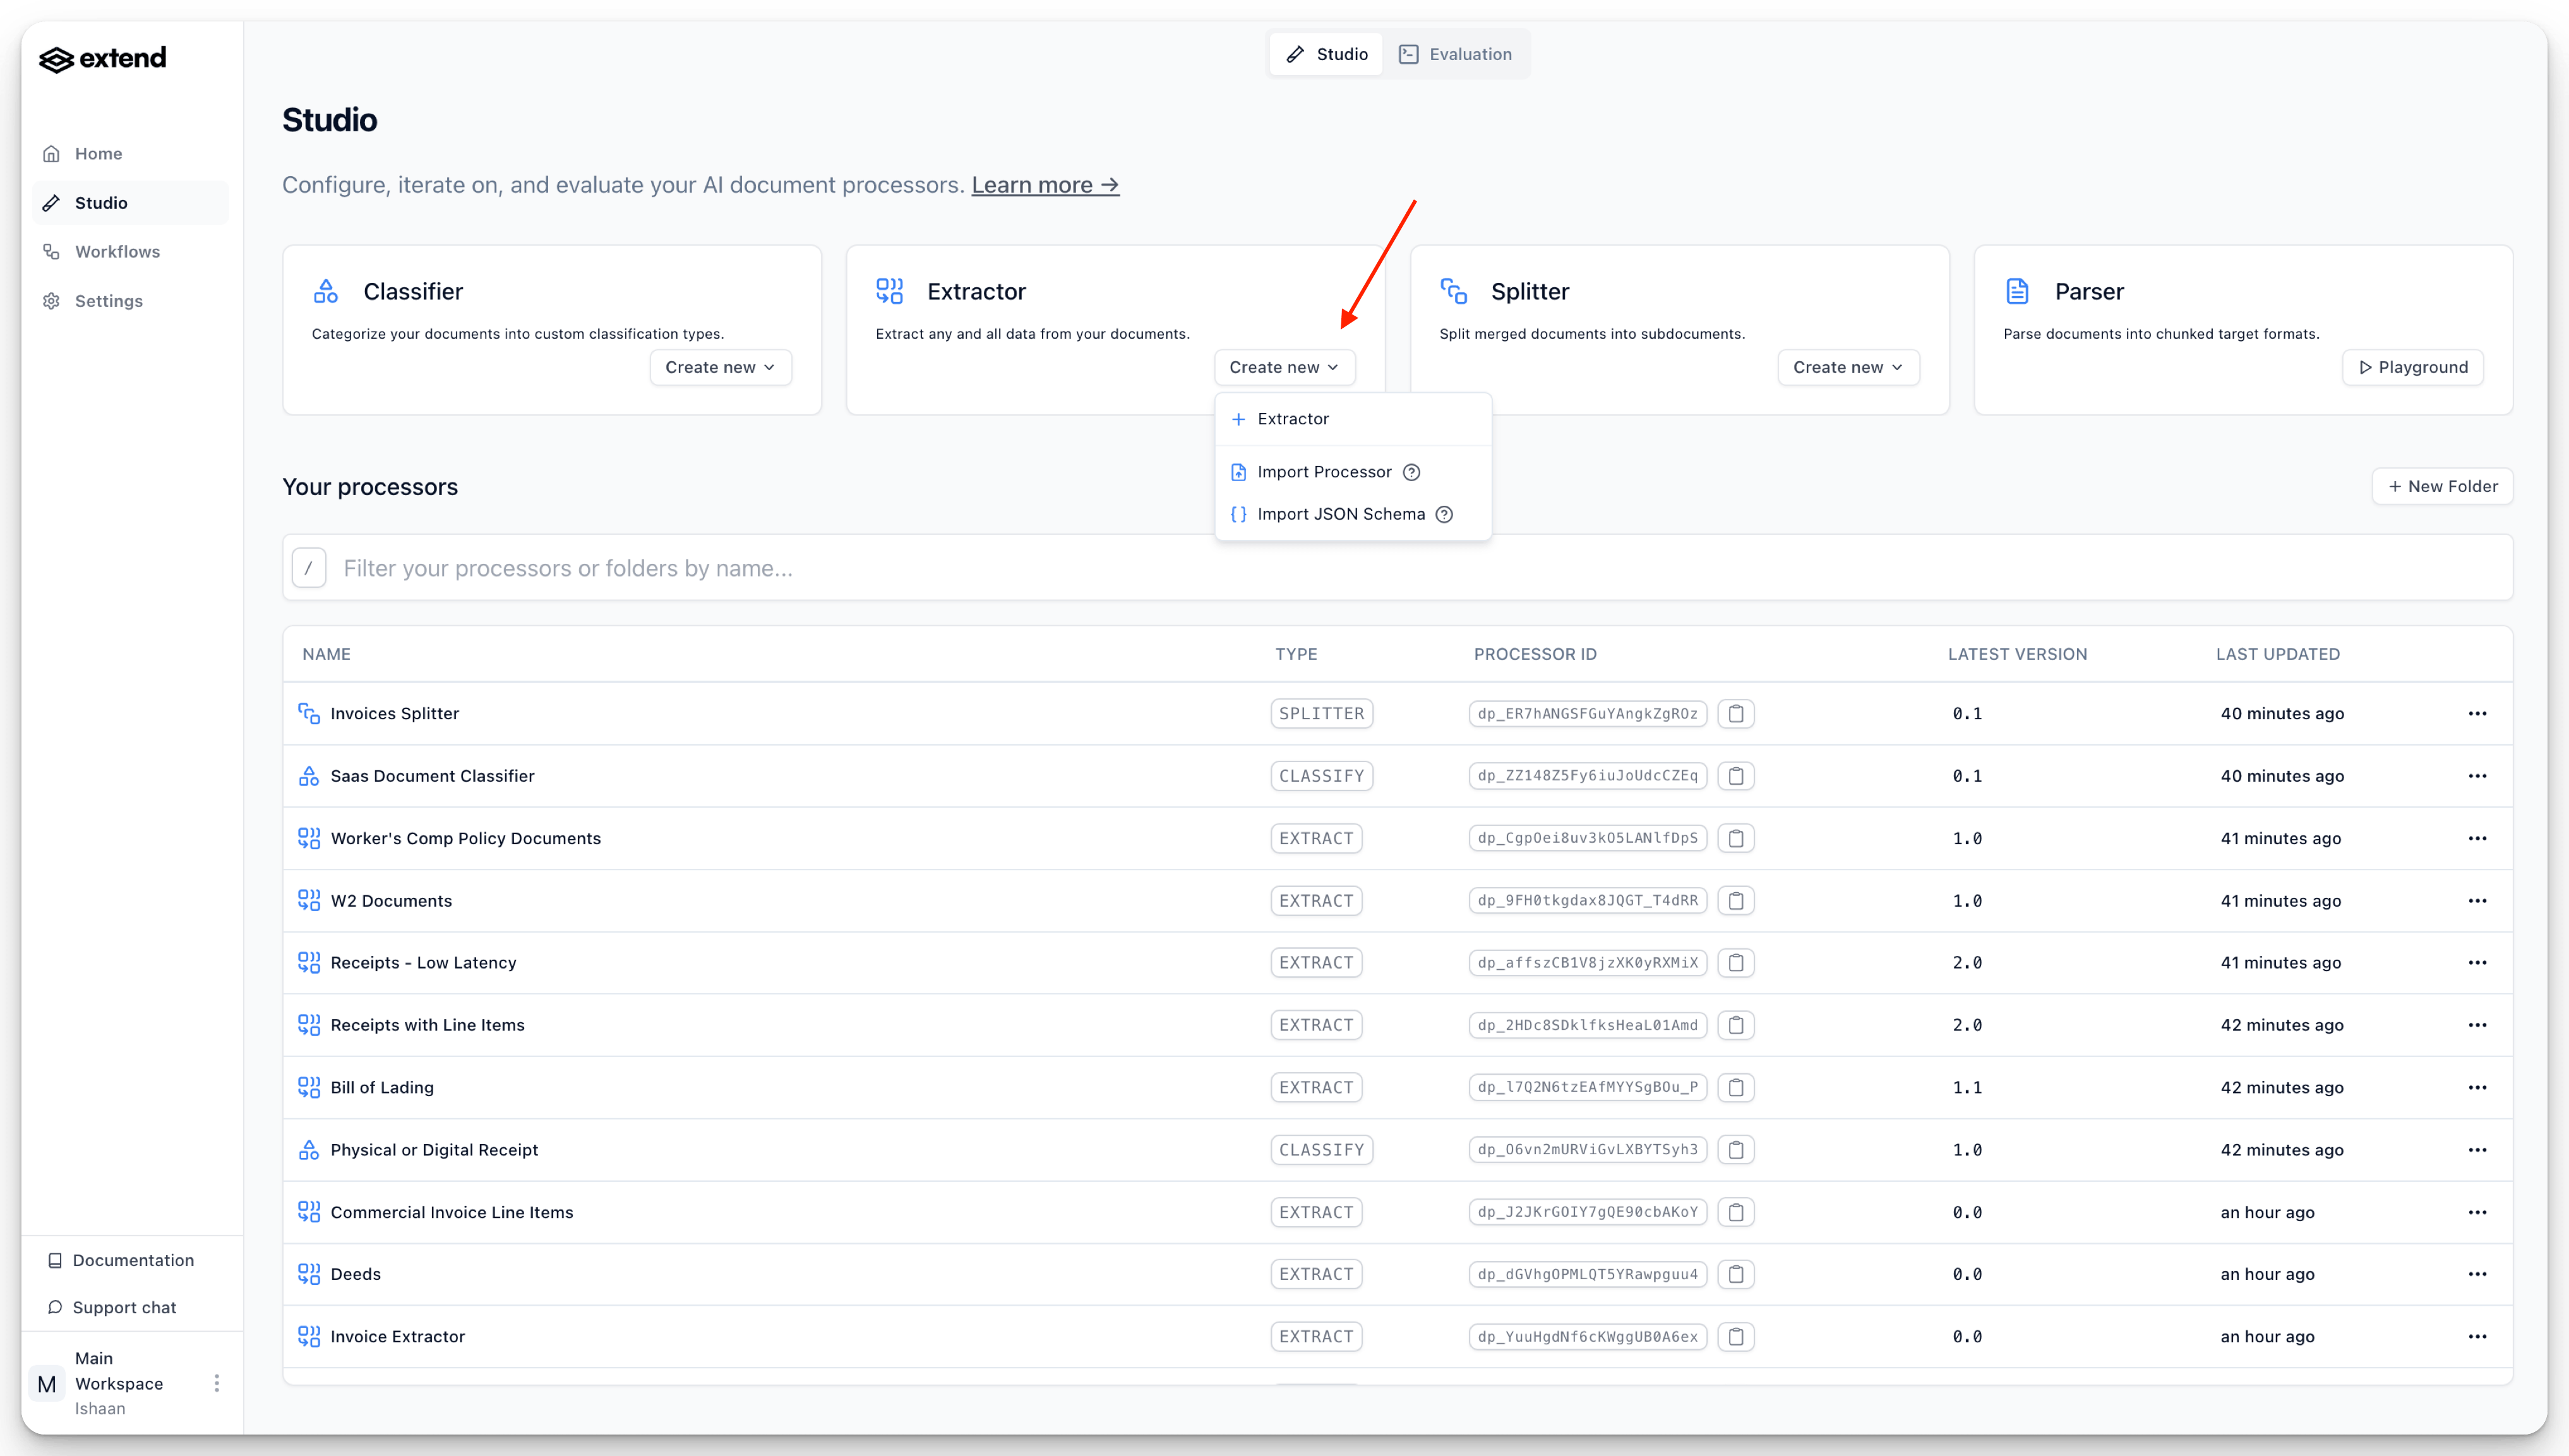
Note that you can also create a processor by importing existing configurations:
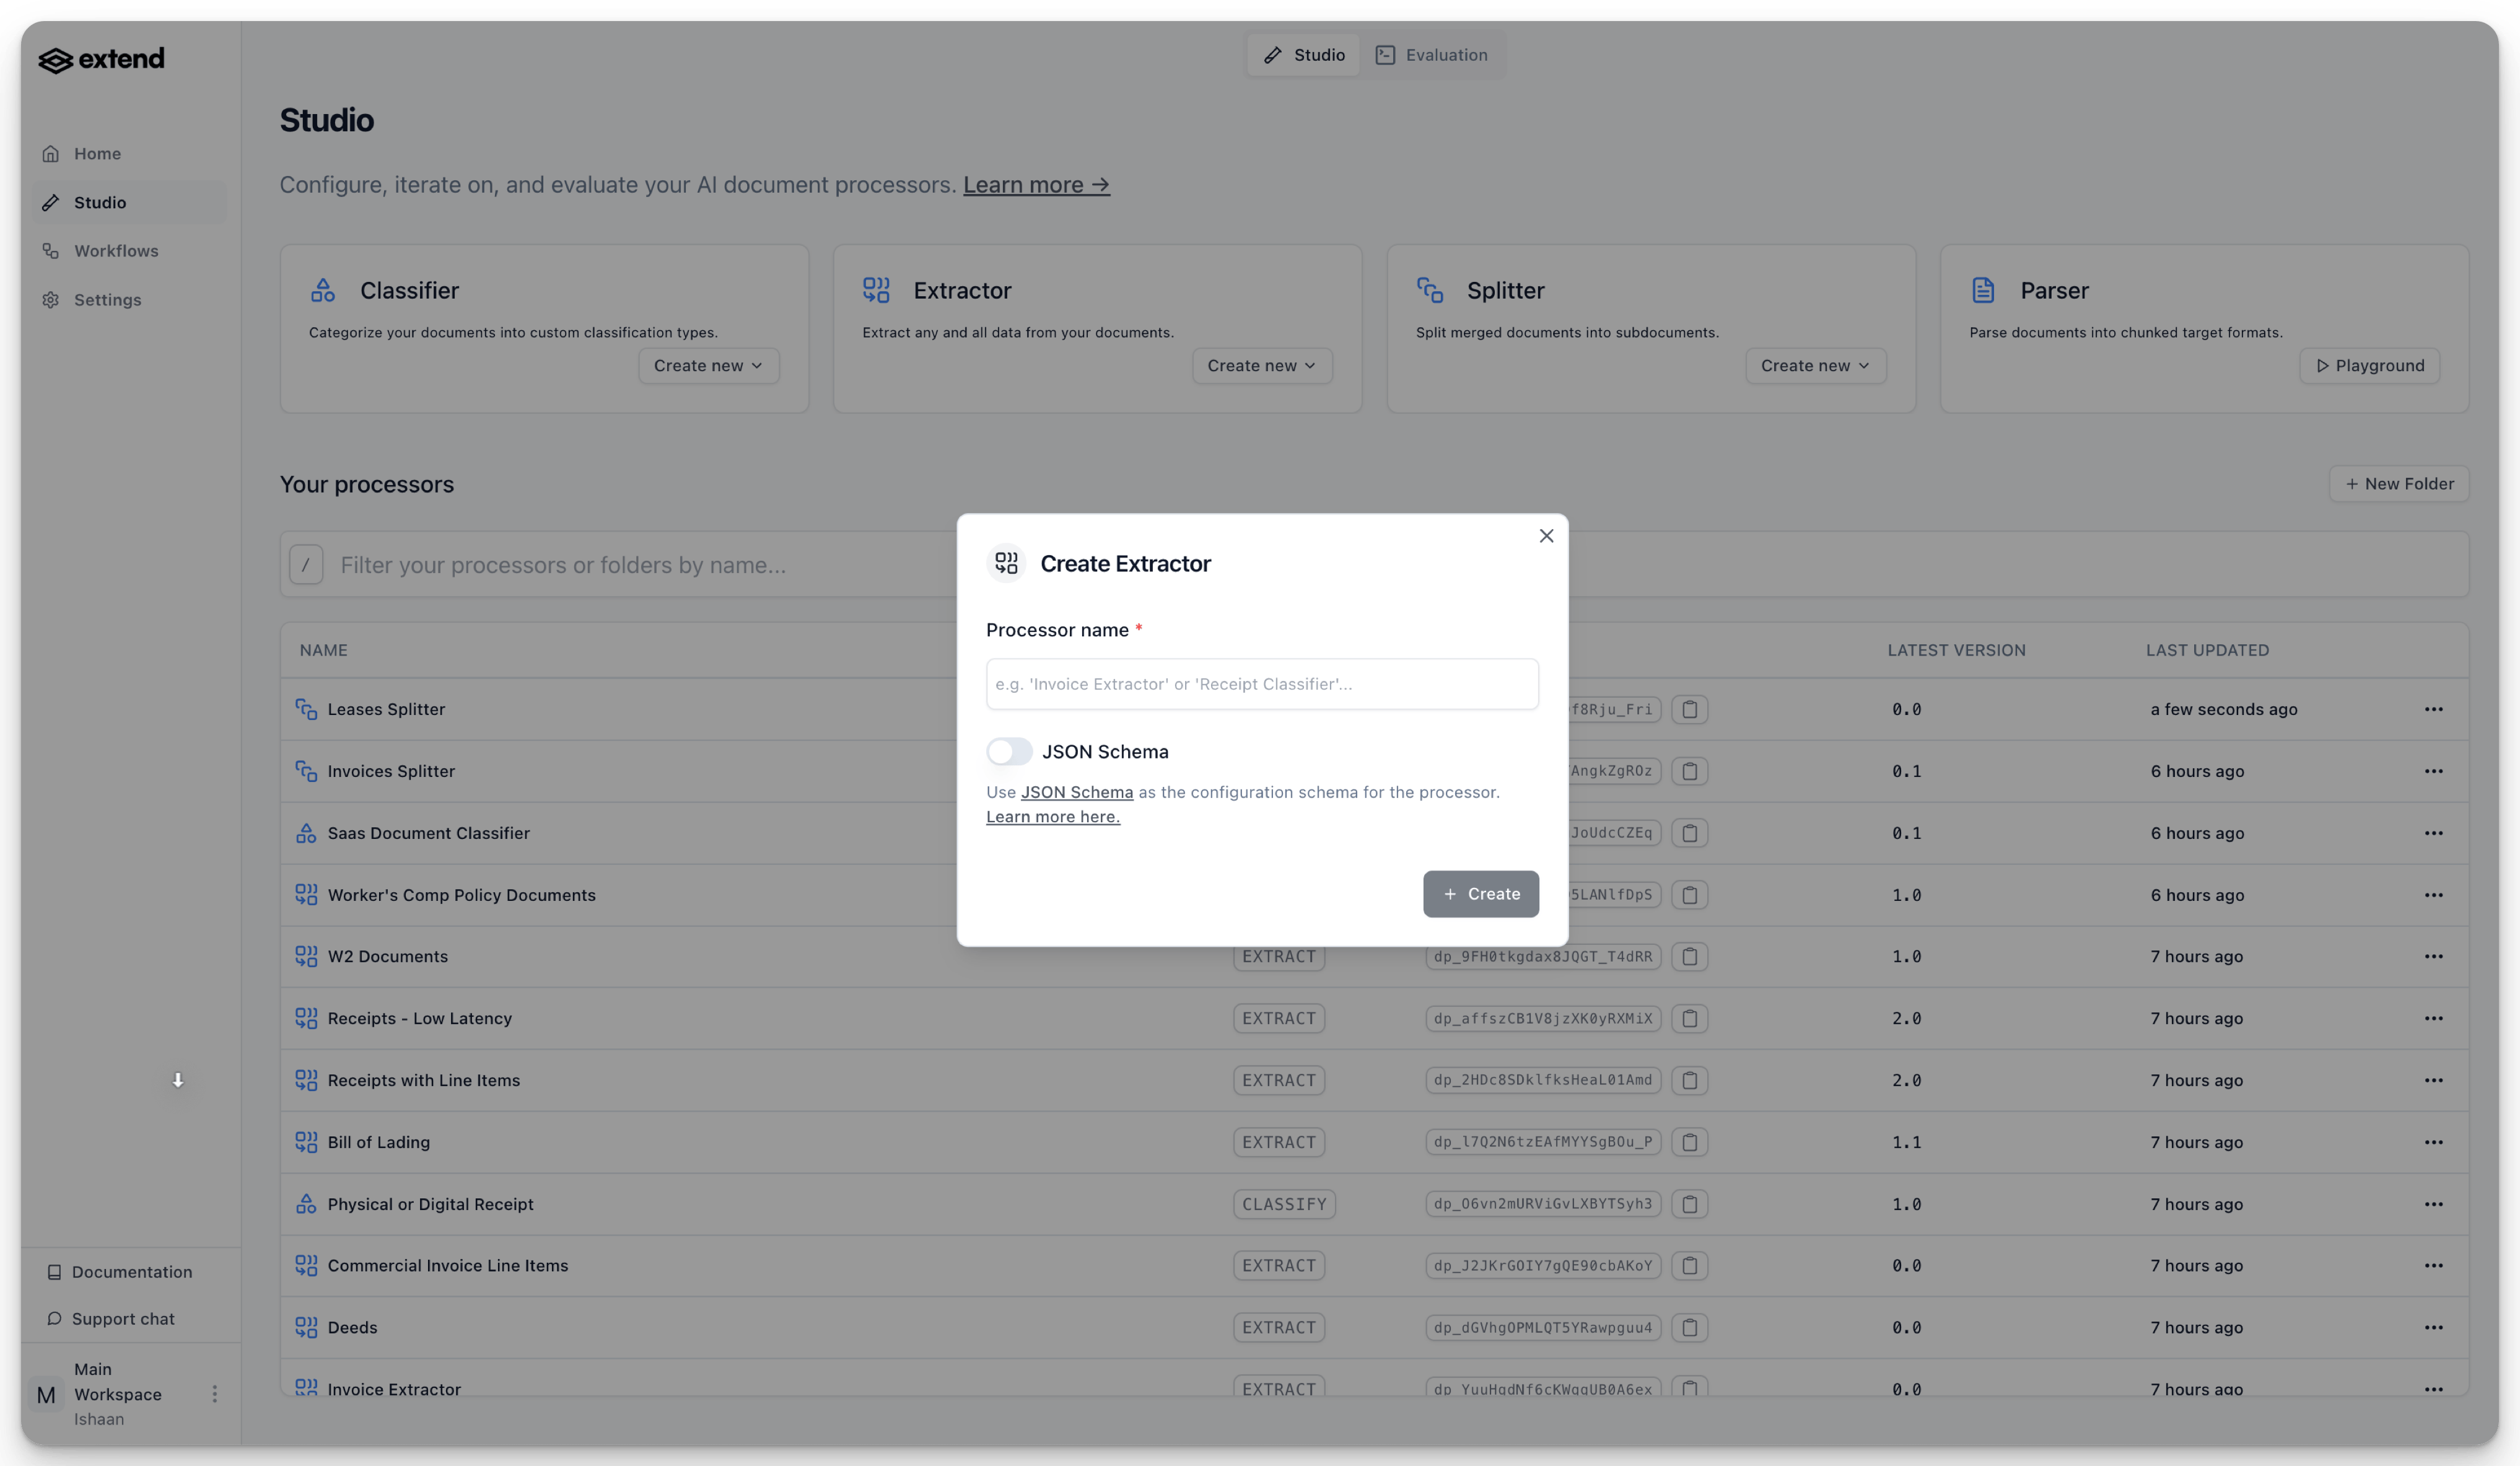
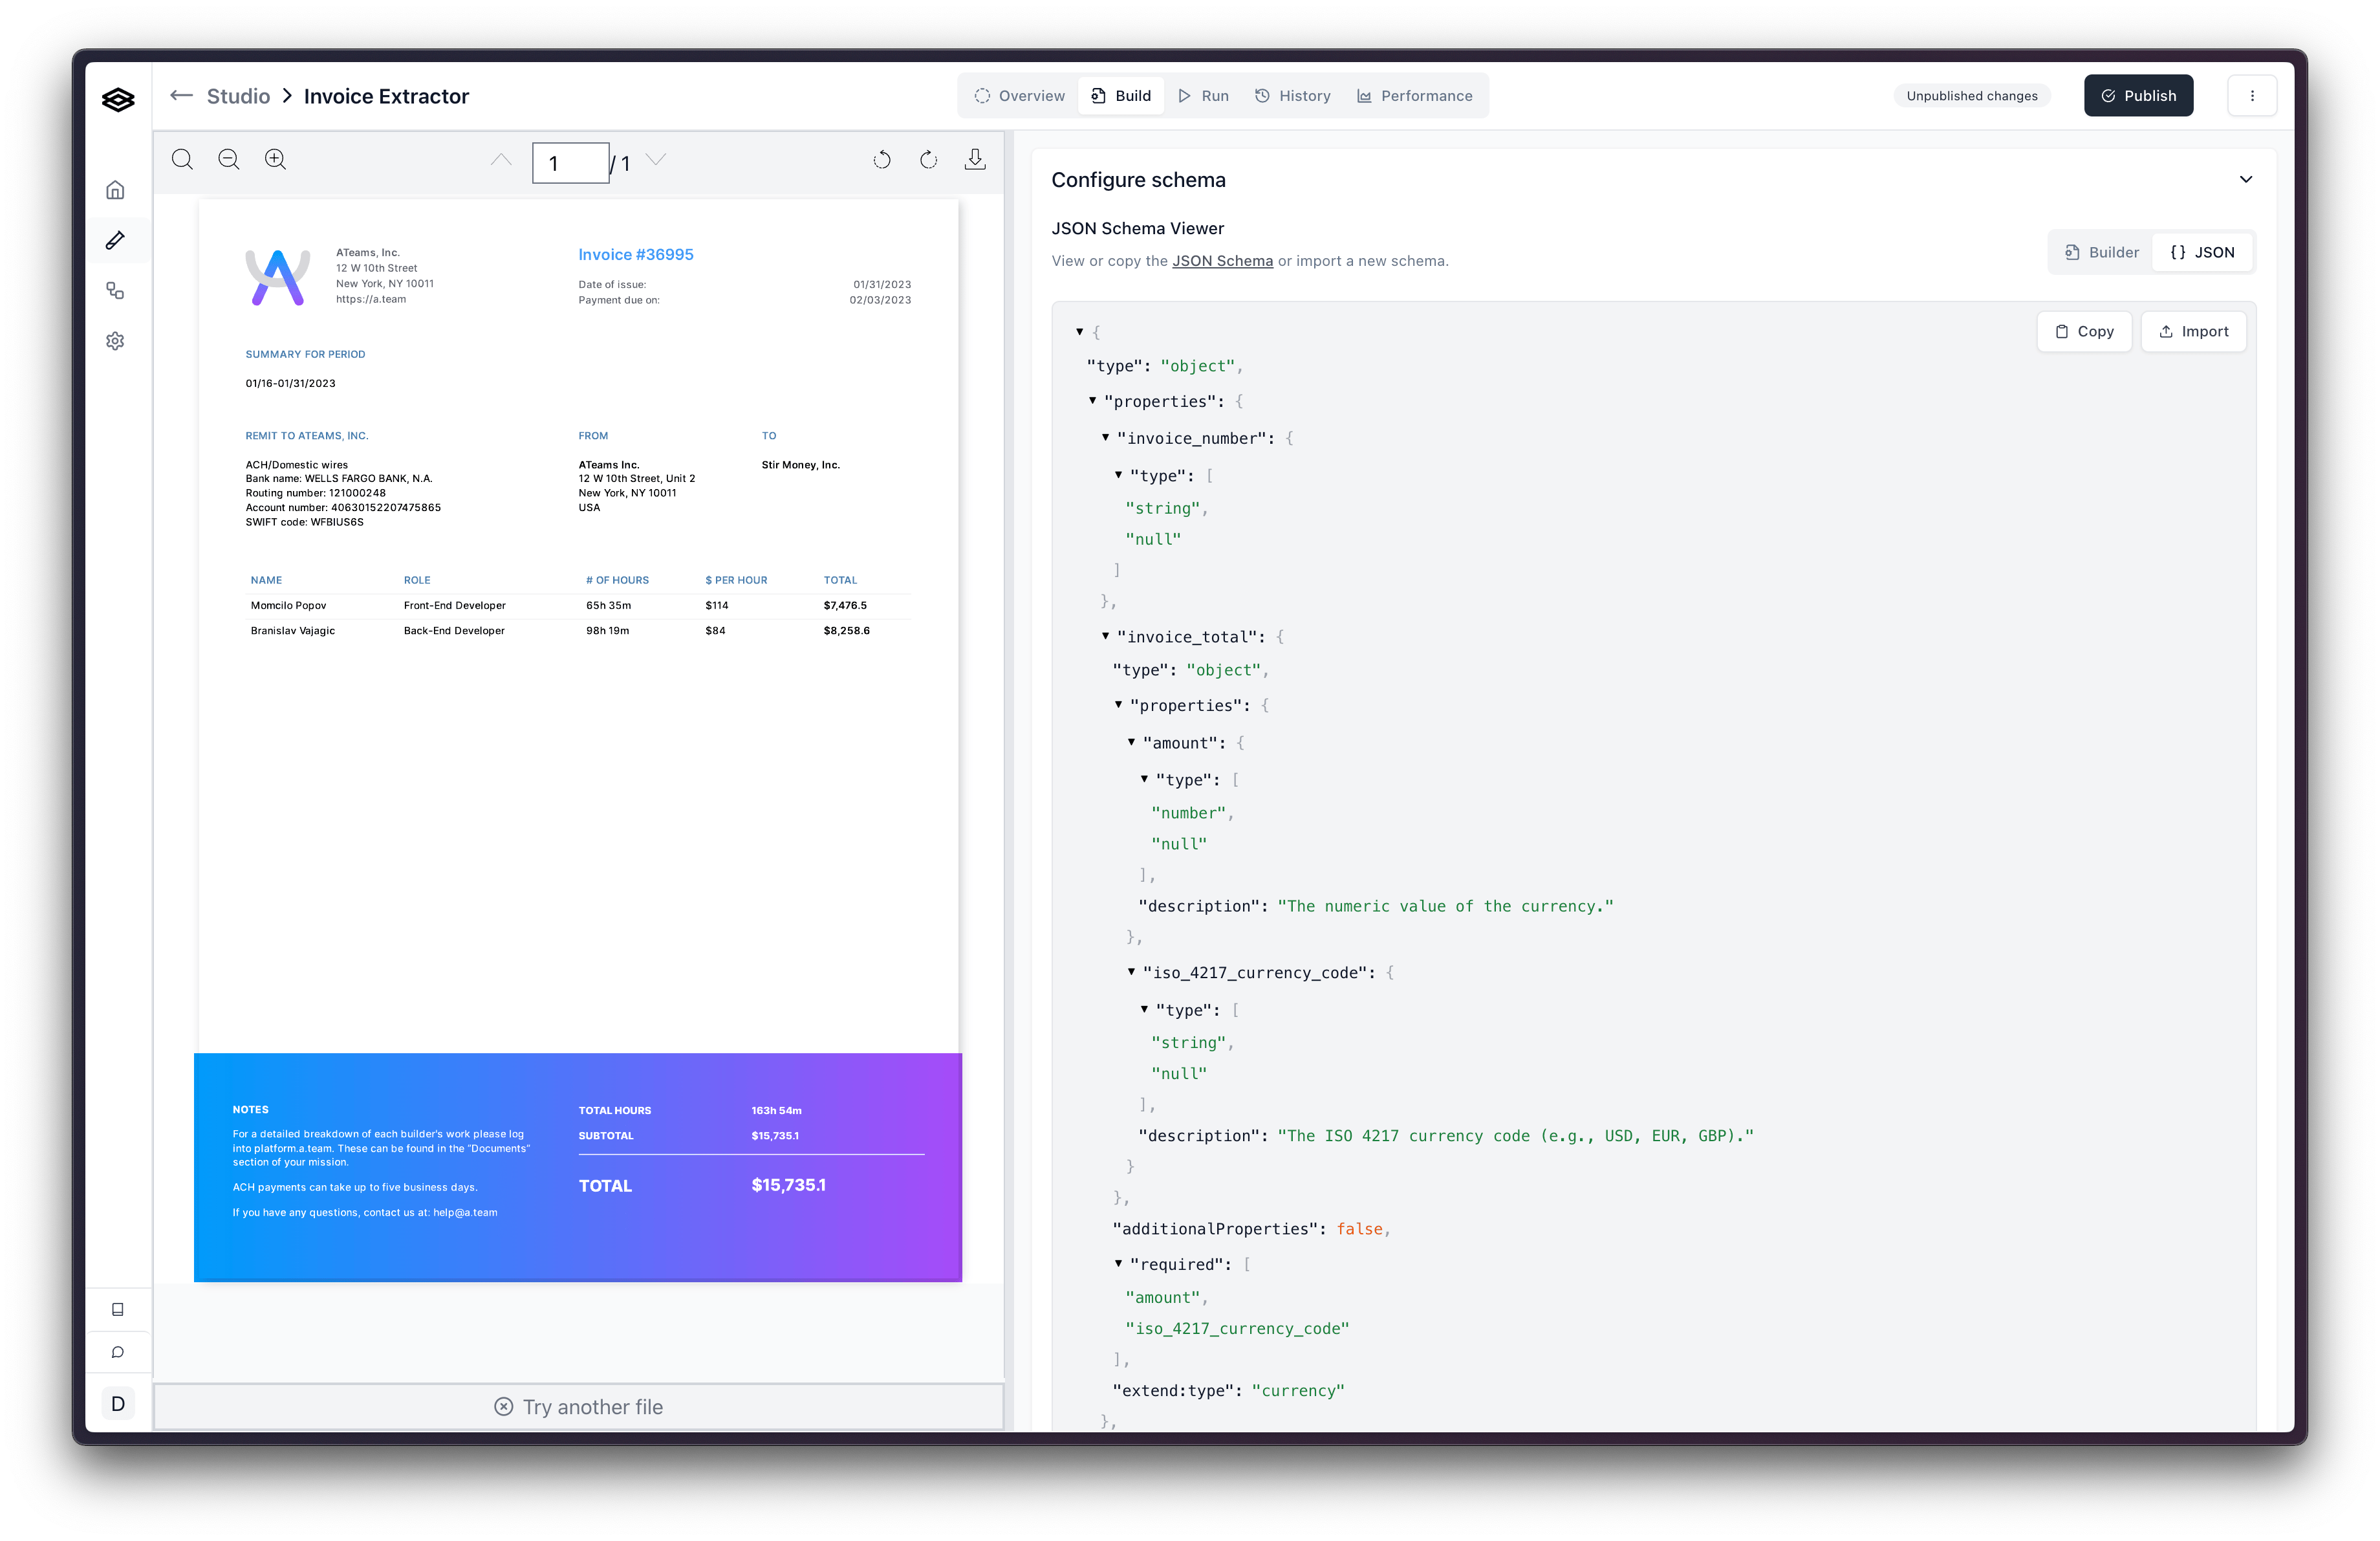
Once you have created an Extraction processor, navigate to the “Build” tab.
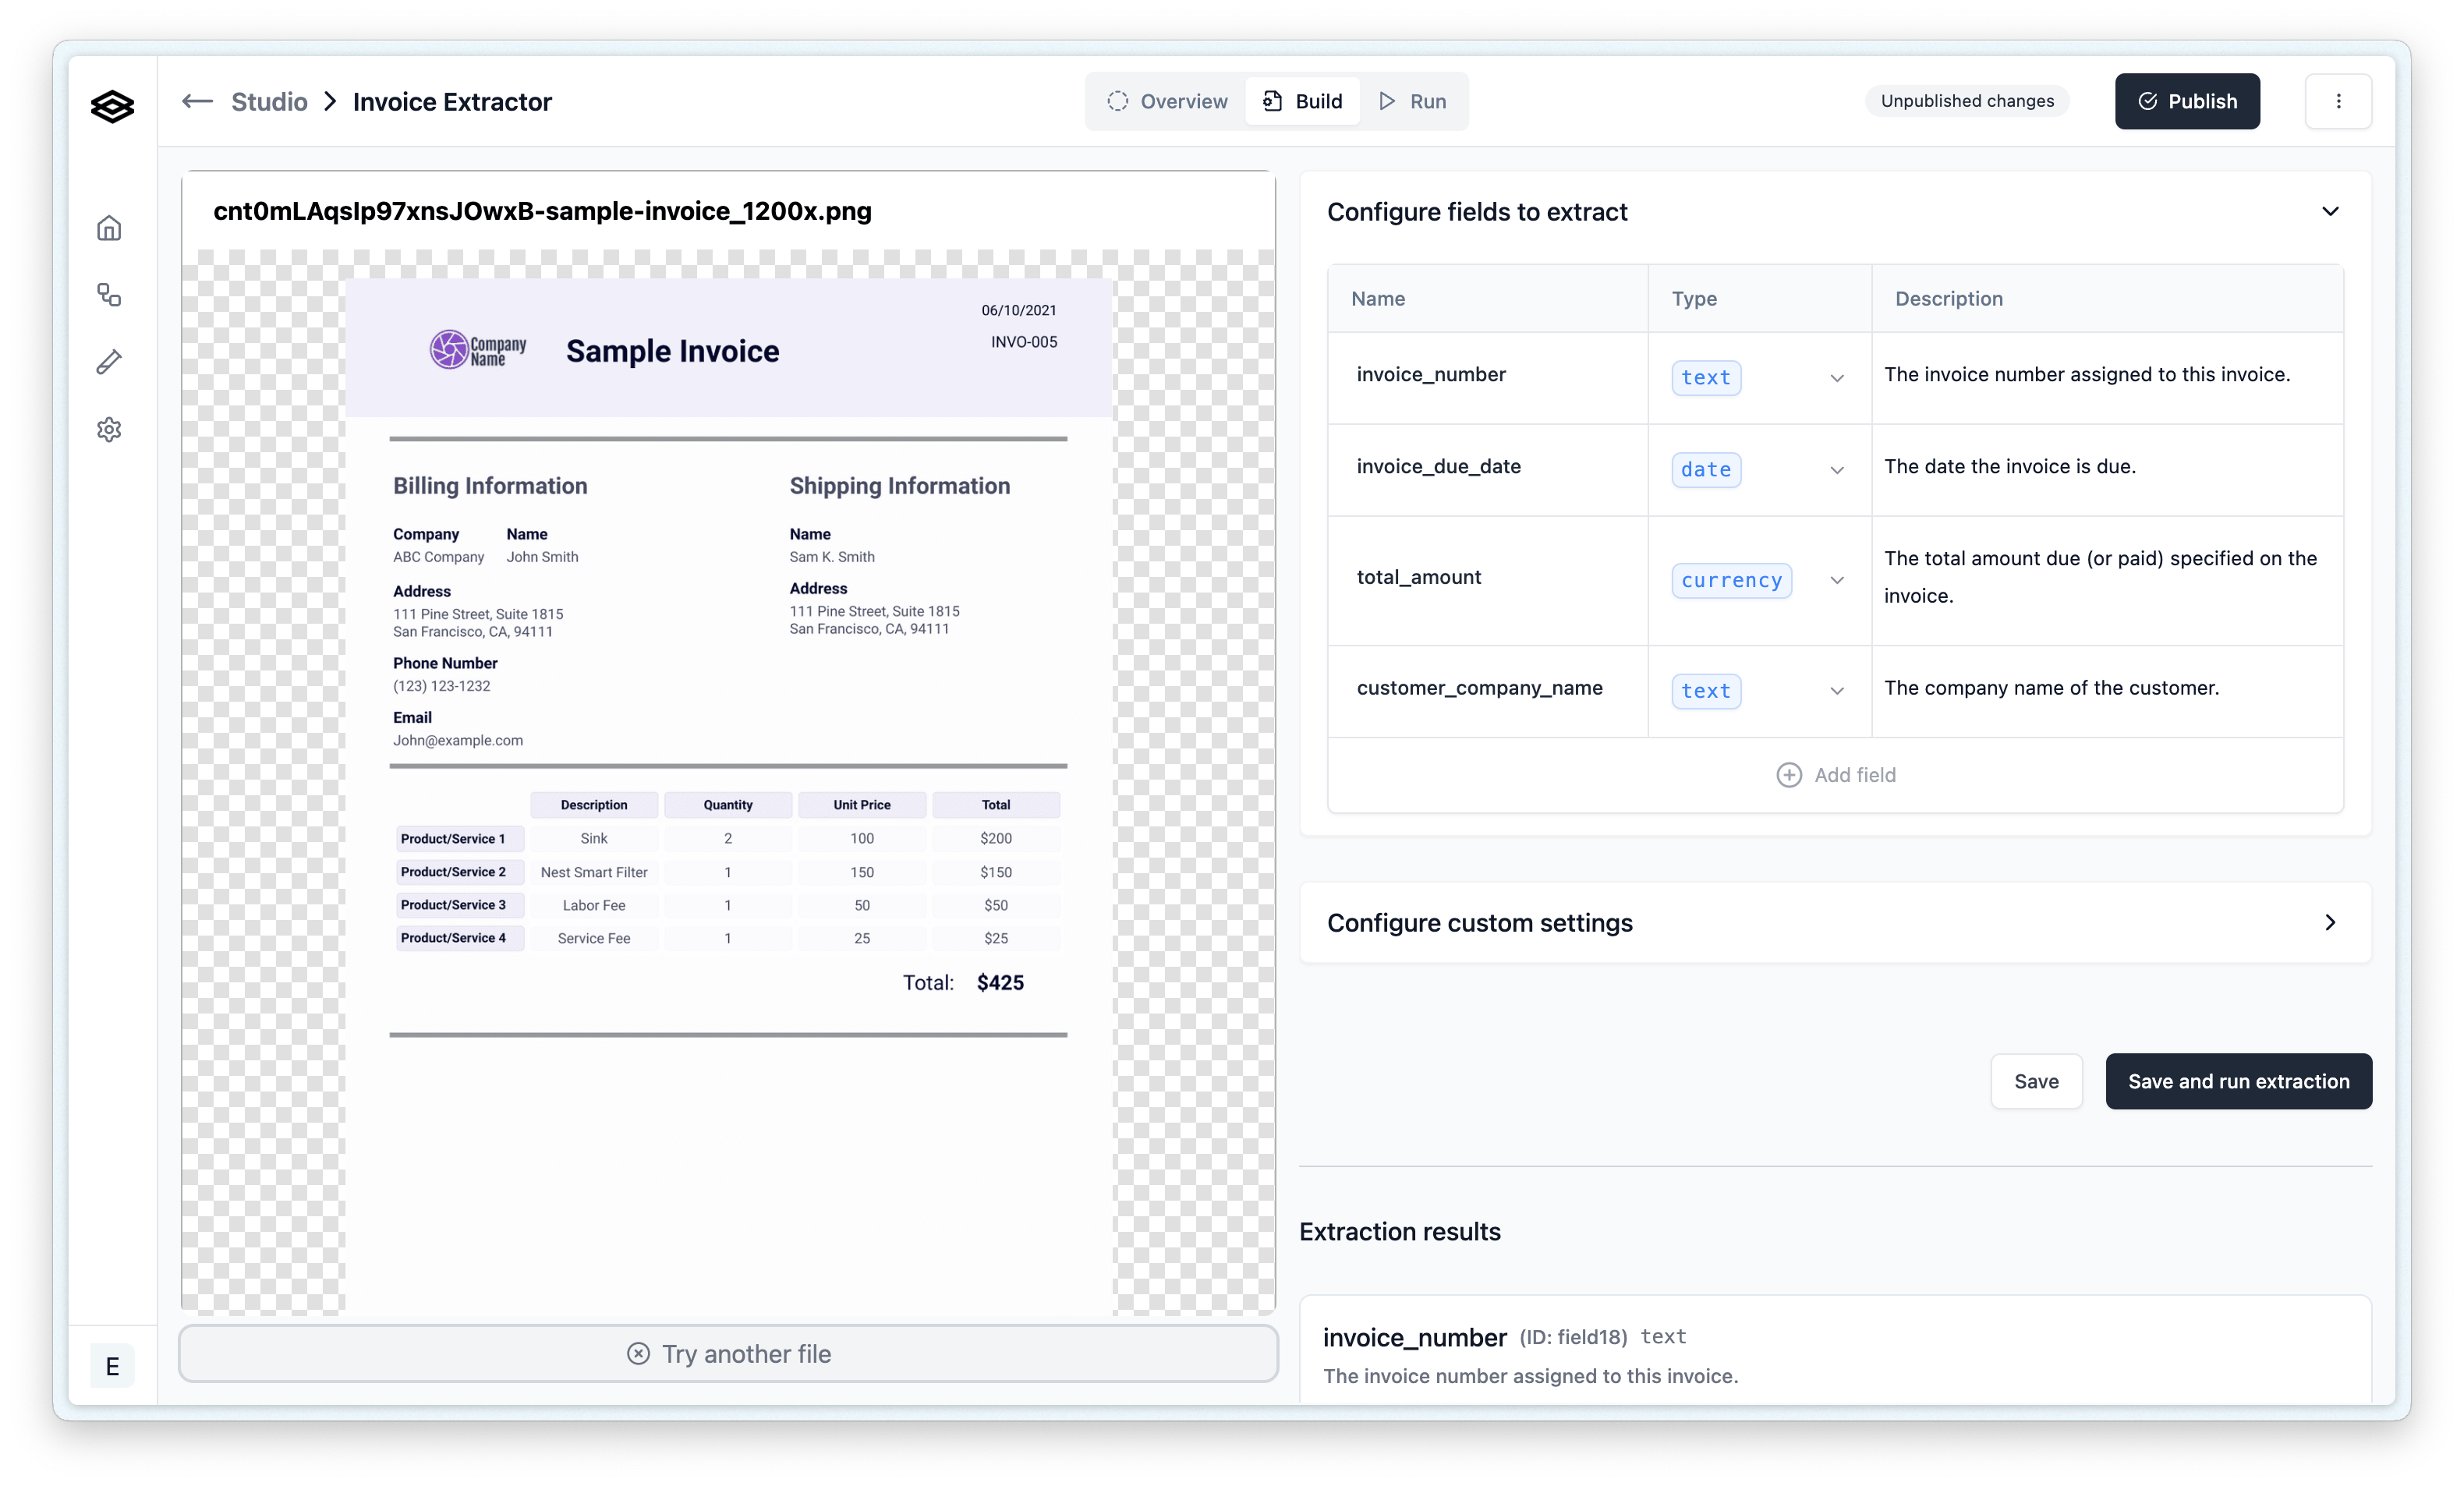
Defining your extraction schema involves adding and configuring properties. A “property” represents a piece of data you want the AI to find and extract (e.g., “invoice_number”, “customer_name”, “total_amount”).
To add and configure a property:
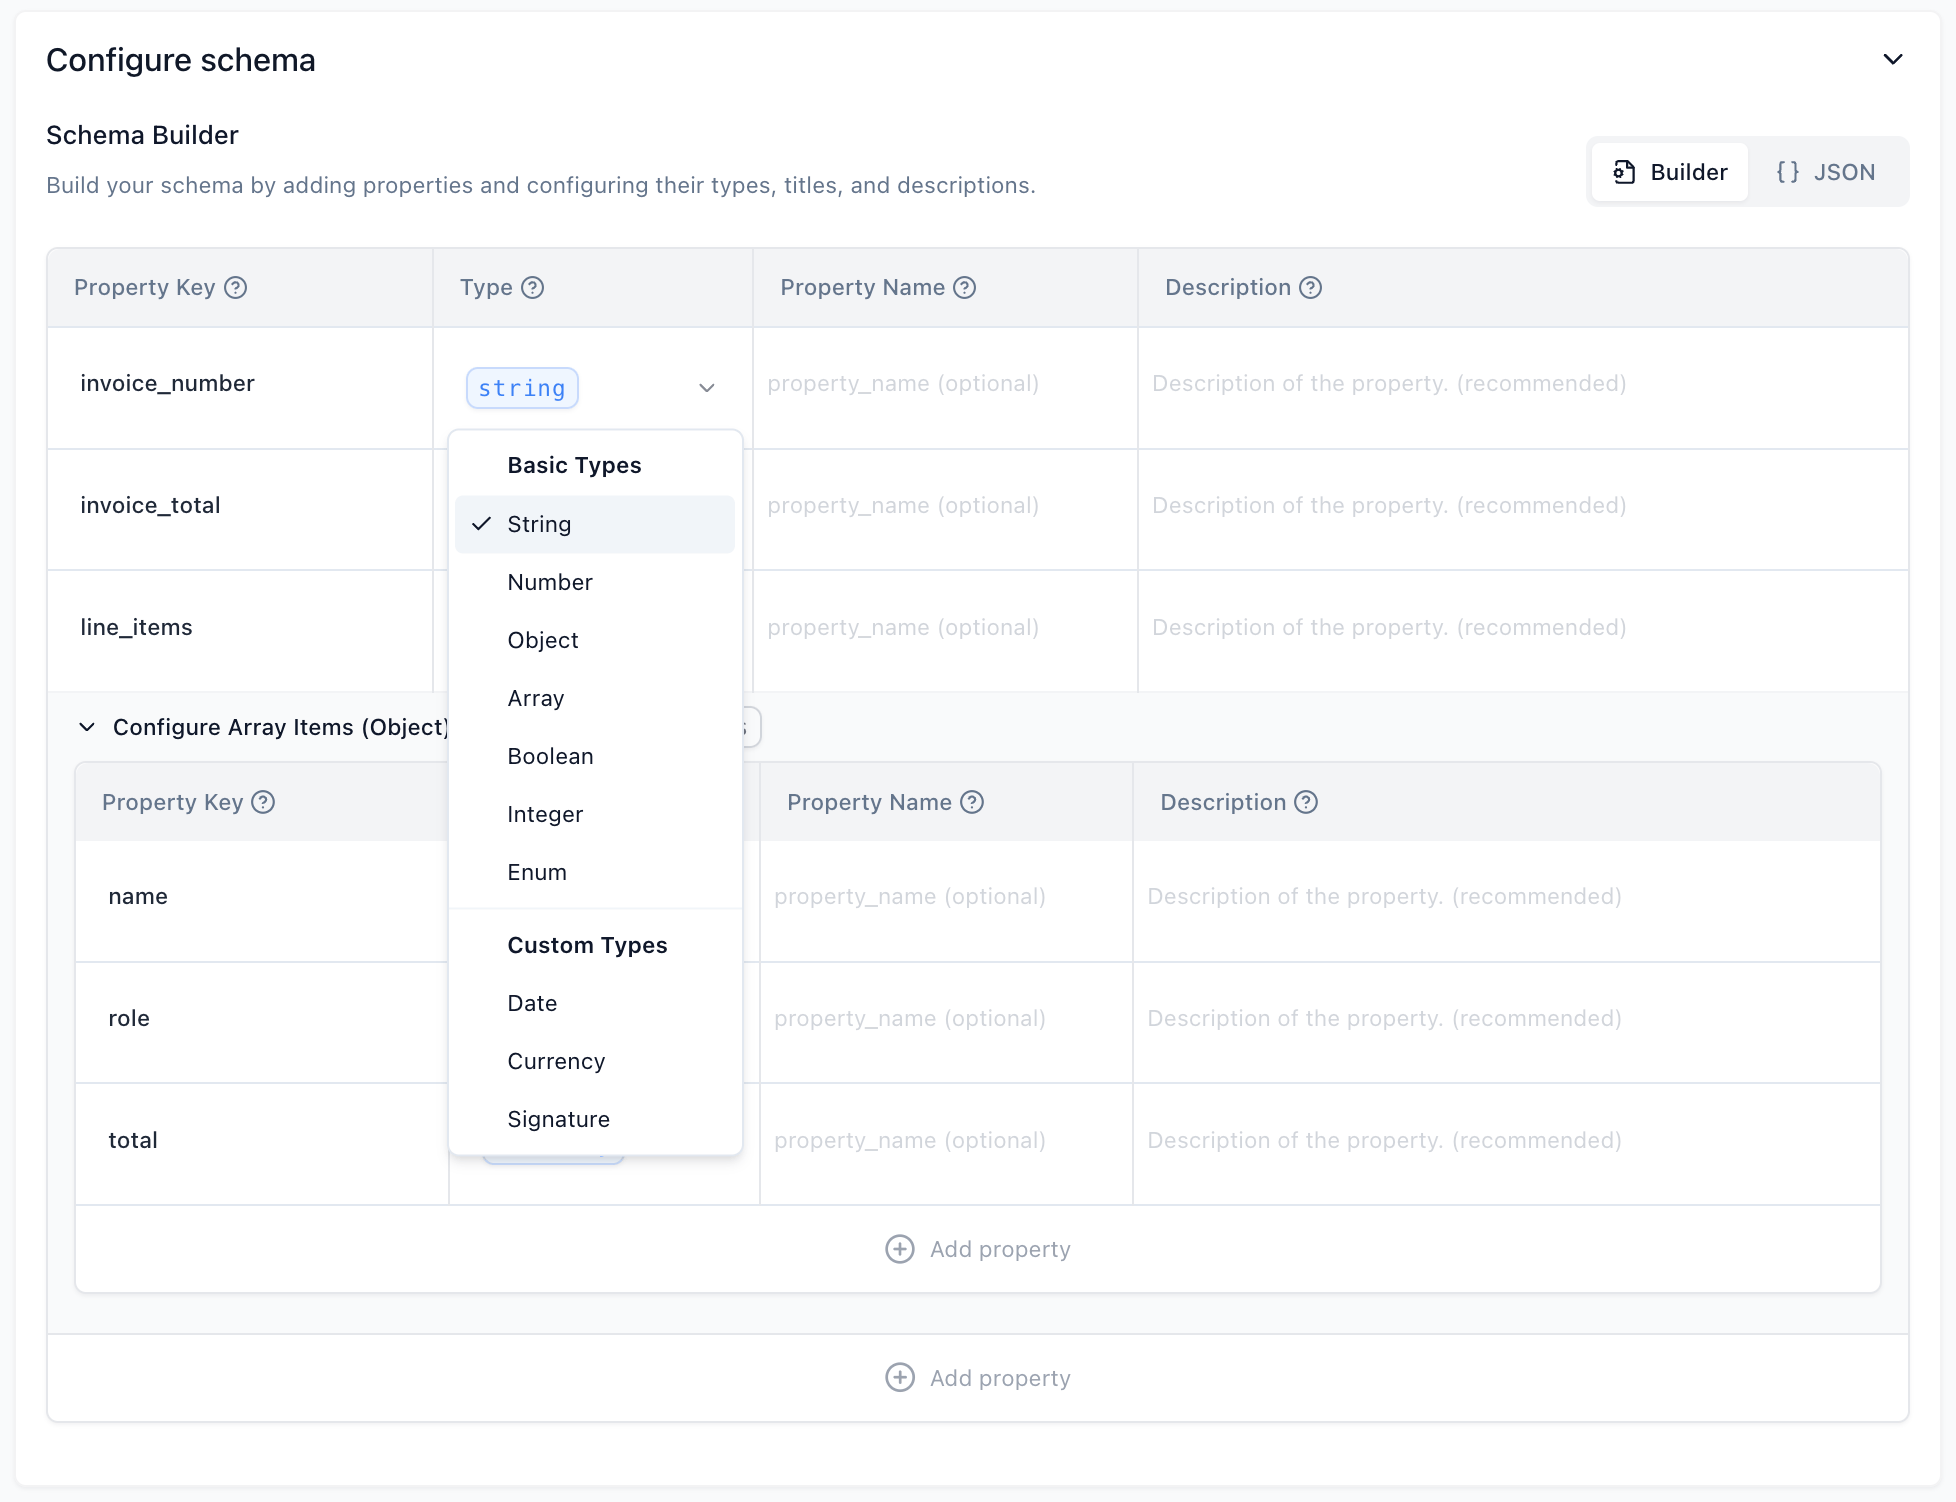
The following property types are supported for the JSON Schema configuration:
These are the fundamental data types for your properties:
Custom types are extensions of the basic types, often Objects, with added validation, specific formatting expectations, and specialized processing logic tailored for common structured data.
YYYY-MM-DD).amount (Number): The numerical value of the currency.iso_4217_currency_code (String): The three-letter ISO 4217 currency code (e.g., “USD”, “EUR”).is_signed (Boolean): Indicates whether a signature is present.printed_name (String, optional): The printed name associated with the signature.signature_date (Date, optional): The date accompanying the signature, formatted as YYYY-MM-DD.title_or_role (String, optional): The job title or role of the signatory.Once you’ve configured your schema using the Schema Builder, you can view the complete JSON Schema representation by clicking the “JSON” toggle. This can be useful for understanding the underlying structure or for sharing the schema.
You can create and configure extractors programmatically using POST /extractors. This is useful for automated pipelines, agent-driven workflows, or anywhere you want to manage extractors without touching the dashboard.
Pass a config object with your JSON Schema to create an extractor with a predefined schema:
If you don’t have a schema ready, pass a generate object instead of config. Extend analyzes your sample documents, generates a JSON Schema, and applies it to the extractor’s draft — all in a single synchronous call.
You can provide 1–5 sample documents as file URLs or existing Extend file IDs. The response includes the extractor with the generated schema already applied to its draft.
instructions to guide generationThe optional instructions field is injected into the schema generation prompt. Use it to provide context the generator can’t infer from the documents alone. There are two common uses:
Document context — Describe the document type and scope to help focus on the right fields:
"These are examples of a W2 form that an employee receives from their employer. We are only interested in the federal return fields, not state return fields."
Field and type constraints — Specify how particular fields should be represented in the schema:
"All date fields should be returned in ISO 8601 format."or"Extract line items as an array of objects with quantity, unit_price, and description."
Both can be combined in a single instructions string. Maximum length is 2,500 characters.
For the full request and response schema, see the Create Extractor API reference.
While the “Build” tab is excellent for initial setup and iterative changes to your processor’s configuration, the “Run” tab is designed for testing your processor more extensively. Effective testing is key to refining your property names, descriptions, and types.
From this tab you can:

After running a batch, the results page will provide insights:
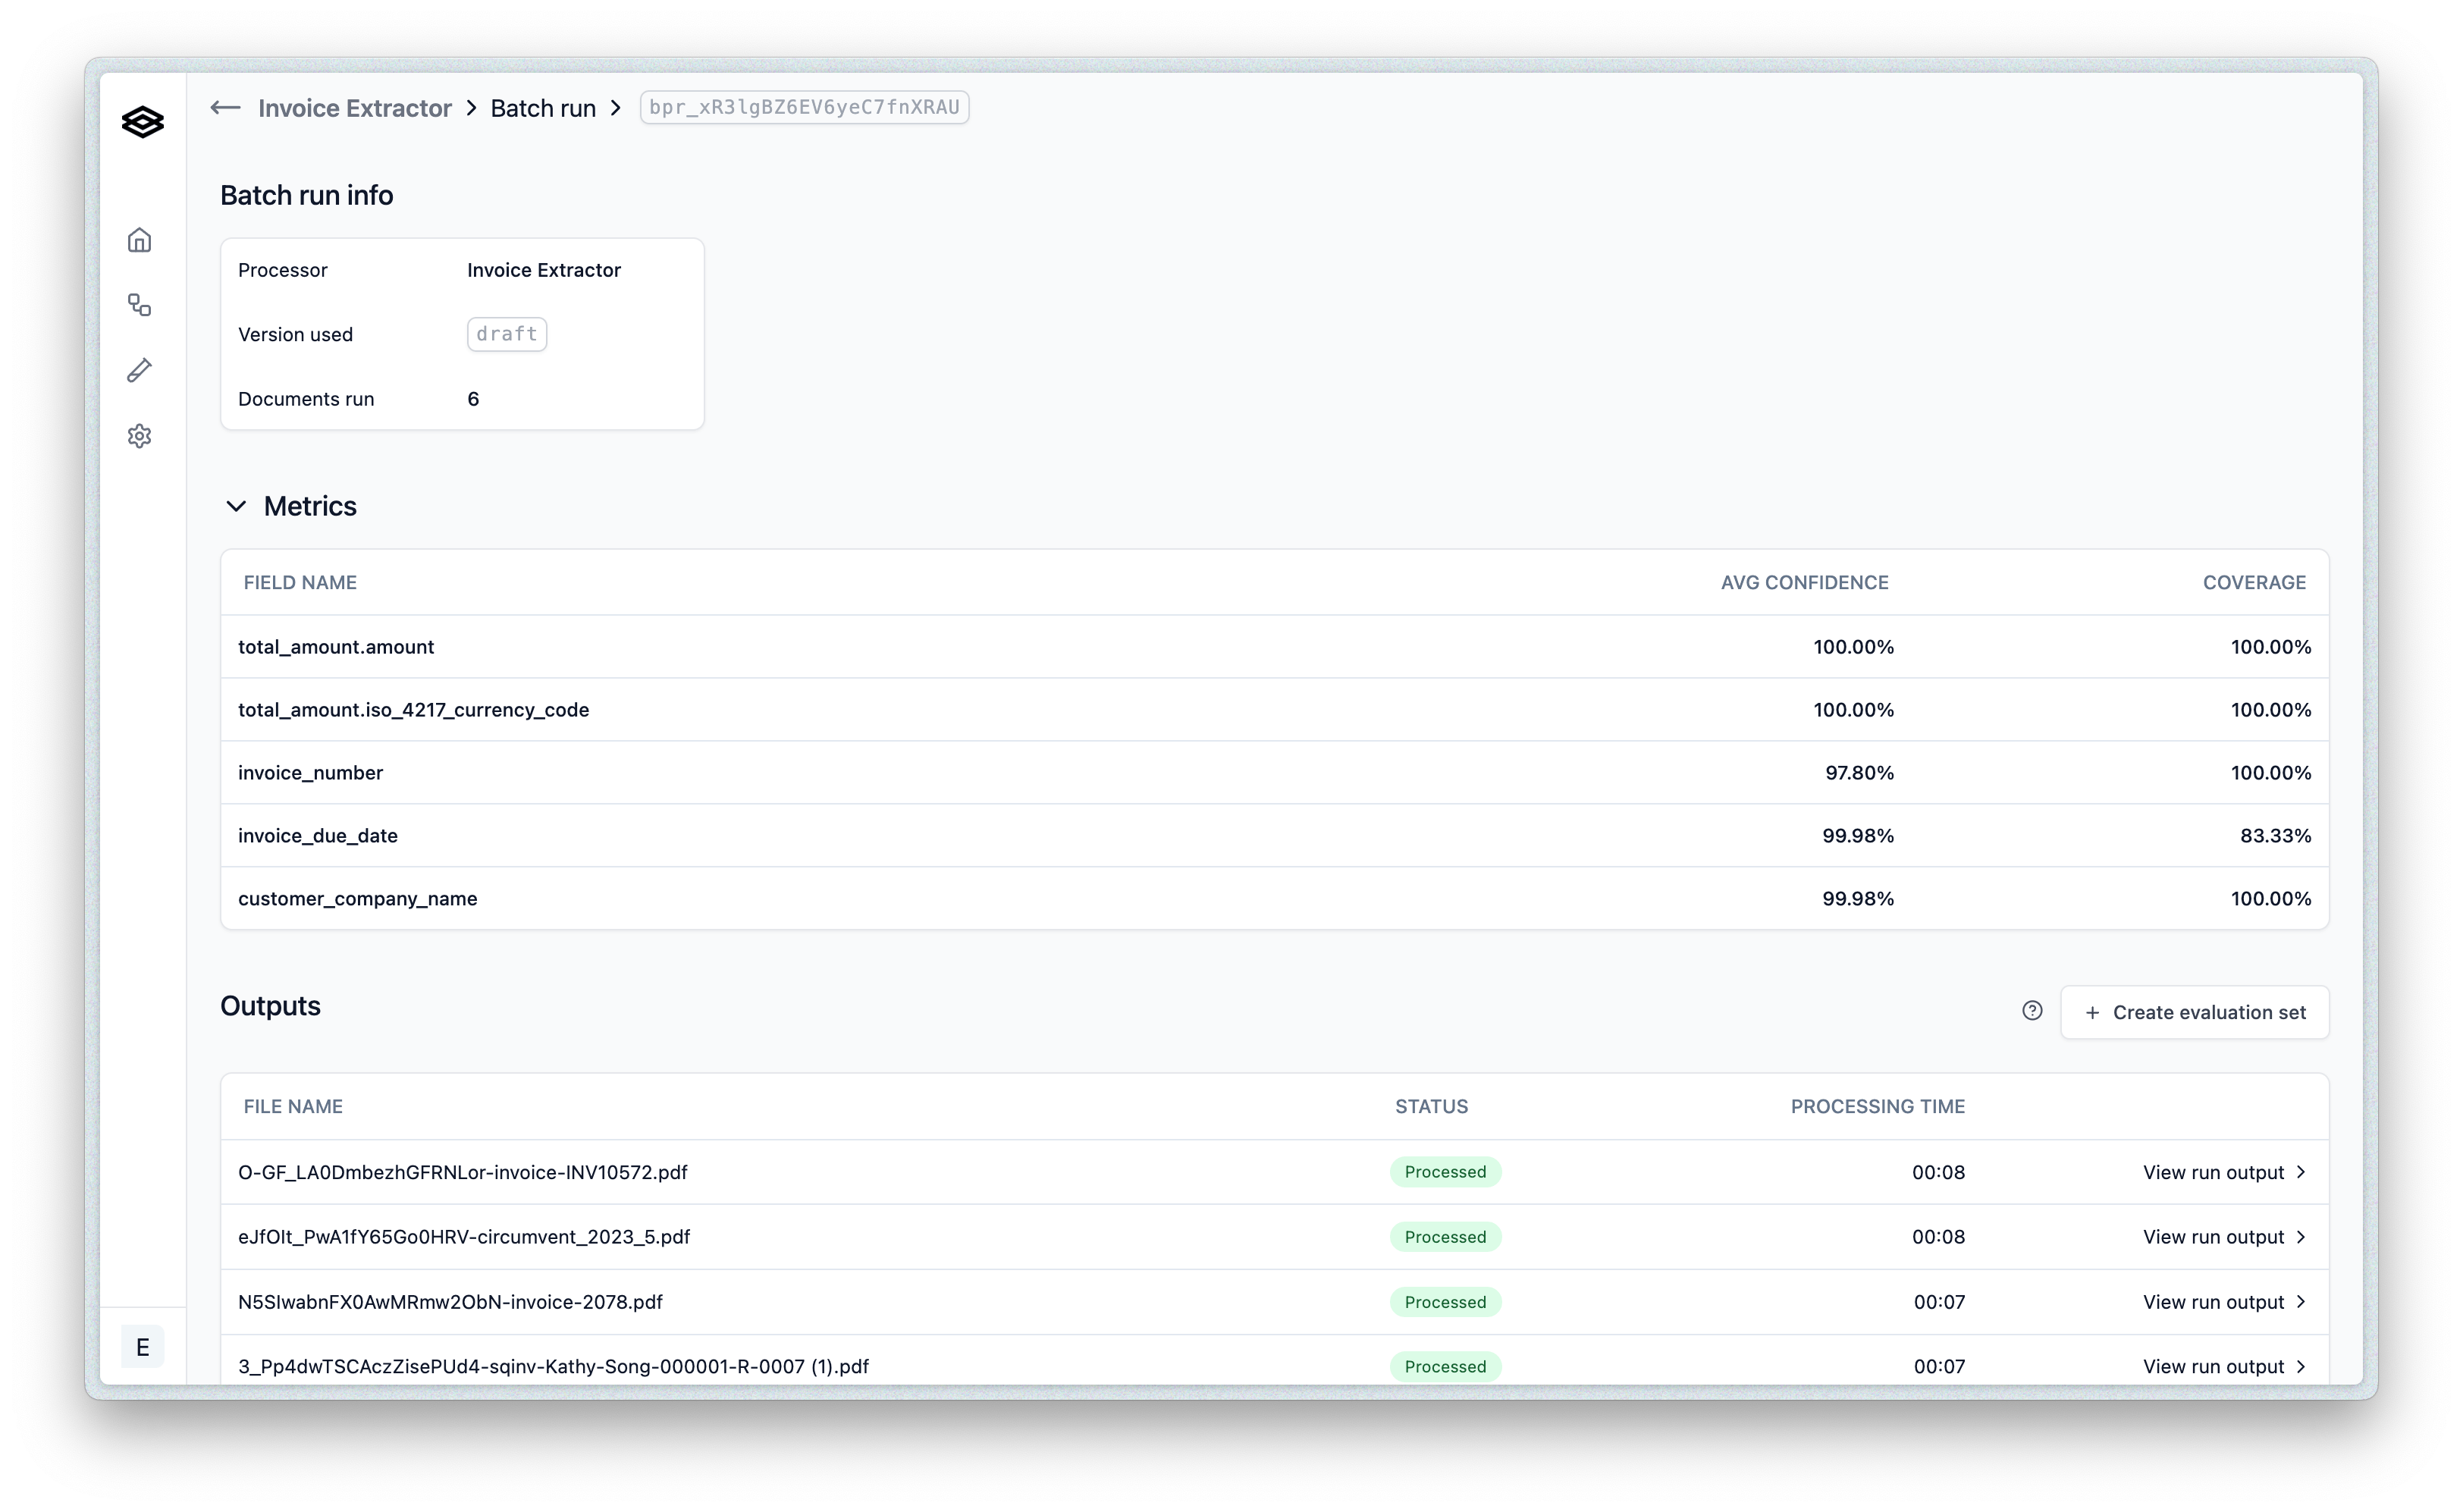
Key actions on the results page include:
Note on Evaluation Sets and Configuration Iteration: It’s generally best to finalize the set of properties you are extracting before heavily investing in creating detailed Evaluation Sets. If you add or remove properties (a schema change), your existing Evaluation Sets might show misleading accuracy or coverage metrics until they are updated to match the new schema. Iterating on names and descriptions with draft versions and smaller test batches is often more efficient in the early stages.
Once you have iteratively configured and tested your processor and are satisfied with its performance, you’ll want to publish it. Publishing makes your processor version available for use in live Workflows.
See the Publishing Processors page for detailed information on how to publish and manage processor versions.