Configuration
Webhooks push events to your server as work completes, so you don’t have to poll for results. You can configure them in the dashboard or with the API — both use the same two building blocks described below.
How webhooks work
Two concepts work together:
- Endpoint — a destination URL that receives events, along with a signing secret used to verify them. Each endpoint is pinned to a single API version.
- Subscription — what an endpoint listens for. There are two kinds, and an endpoint can use both at once:
- Global events are set directly on the endpoint (its
enabledEvents). They fire for every resource of that type in the workspace, plus workspace-level lifecycle events likeextractor.createdandworkflow.deployed. - Resource-scoped subscriptions bind an endpoint to a single resource — one extractor, classifier, splitter, or workflow — so you only receive that resource’s events.
- Global events are set directly on the endpoint (its
Run events are only delivered for runs created through the API — runs started from the dashboard do not trigger webhooks.
Some events are only available as resource-scoped subscriptions. workflow_run.* events (for example workflow_run.completed) and other per-run workflow events are delivered through workflow subscriptions, not global events. Run-completion events like extract_run.processed are available at both levels — globally for all extractors, or scoped to a single extractor.
Set up a webhook in the dashboard
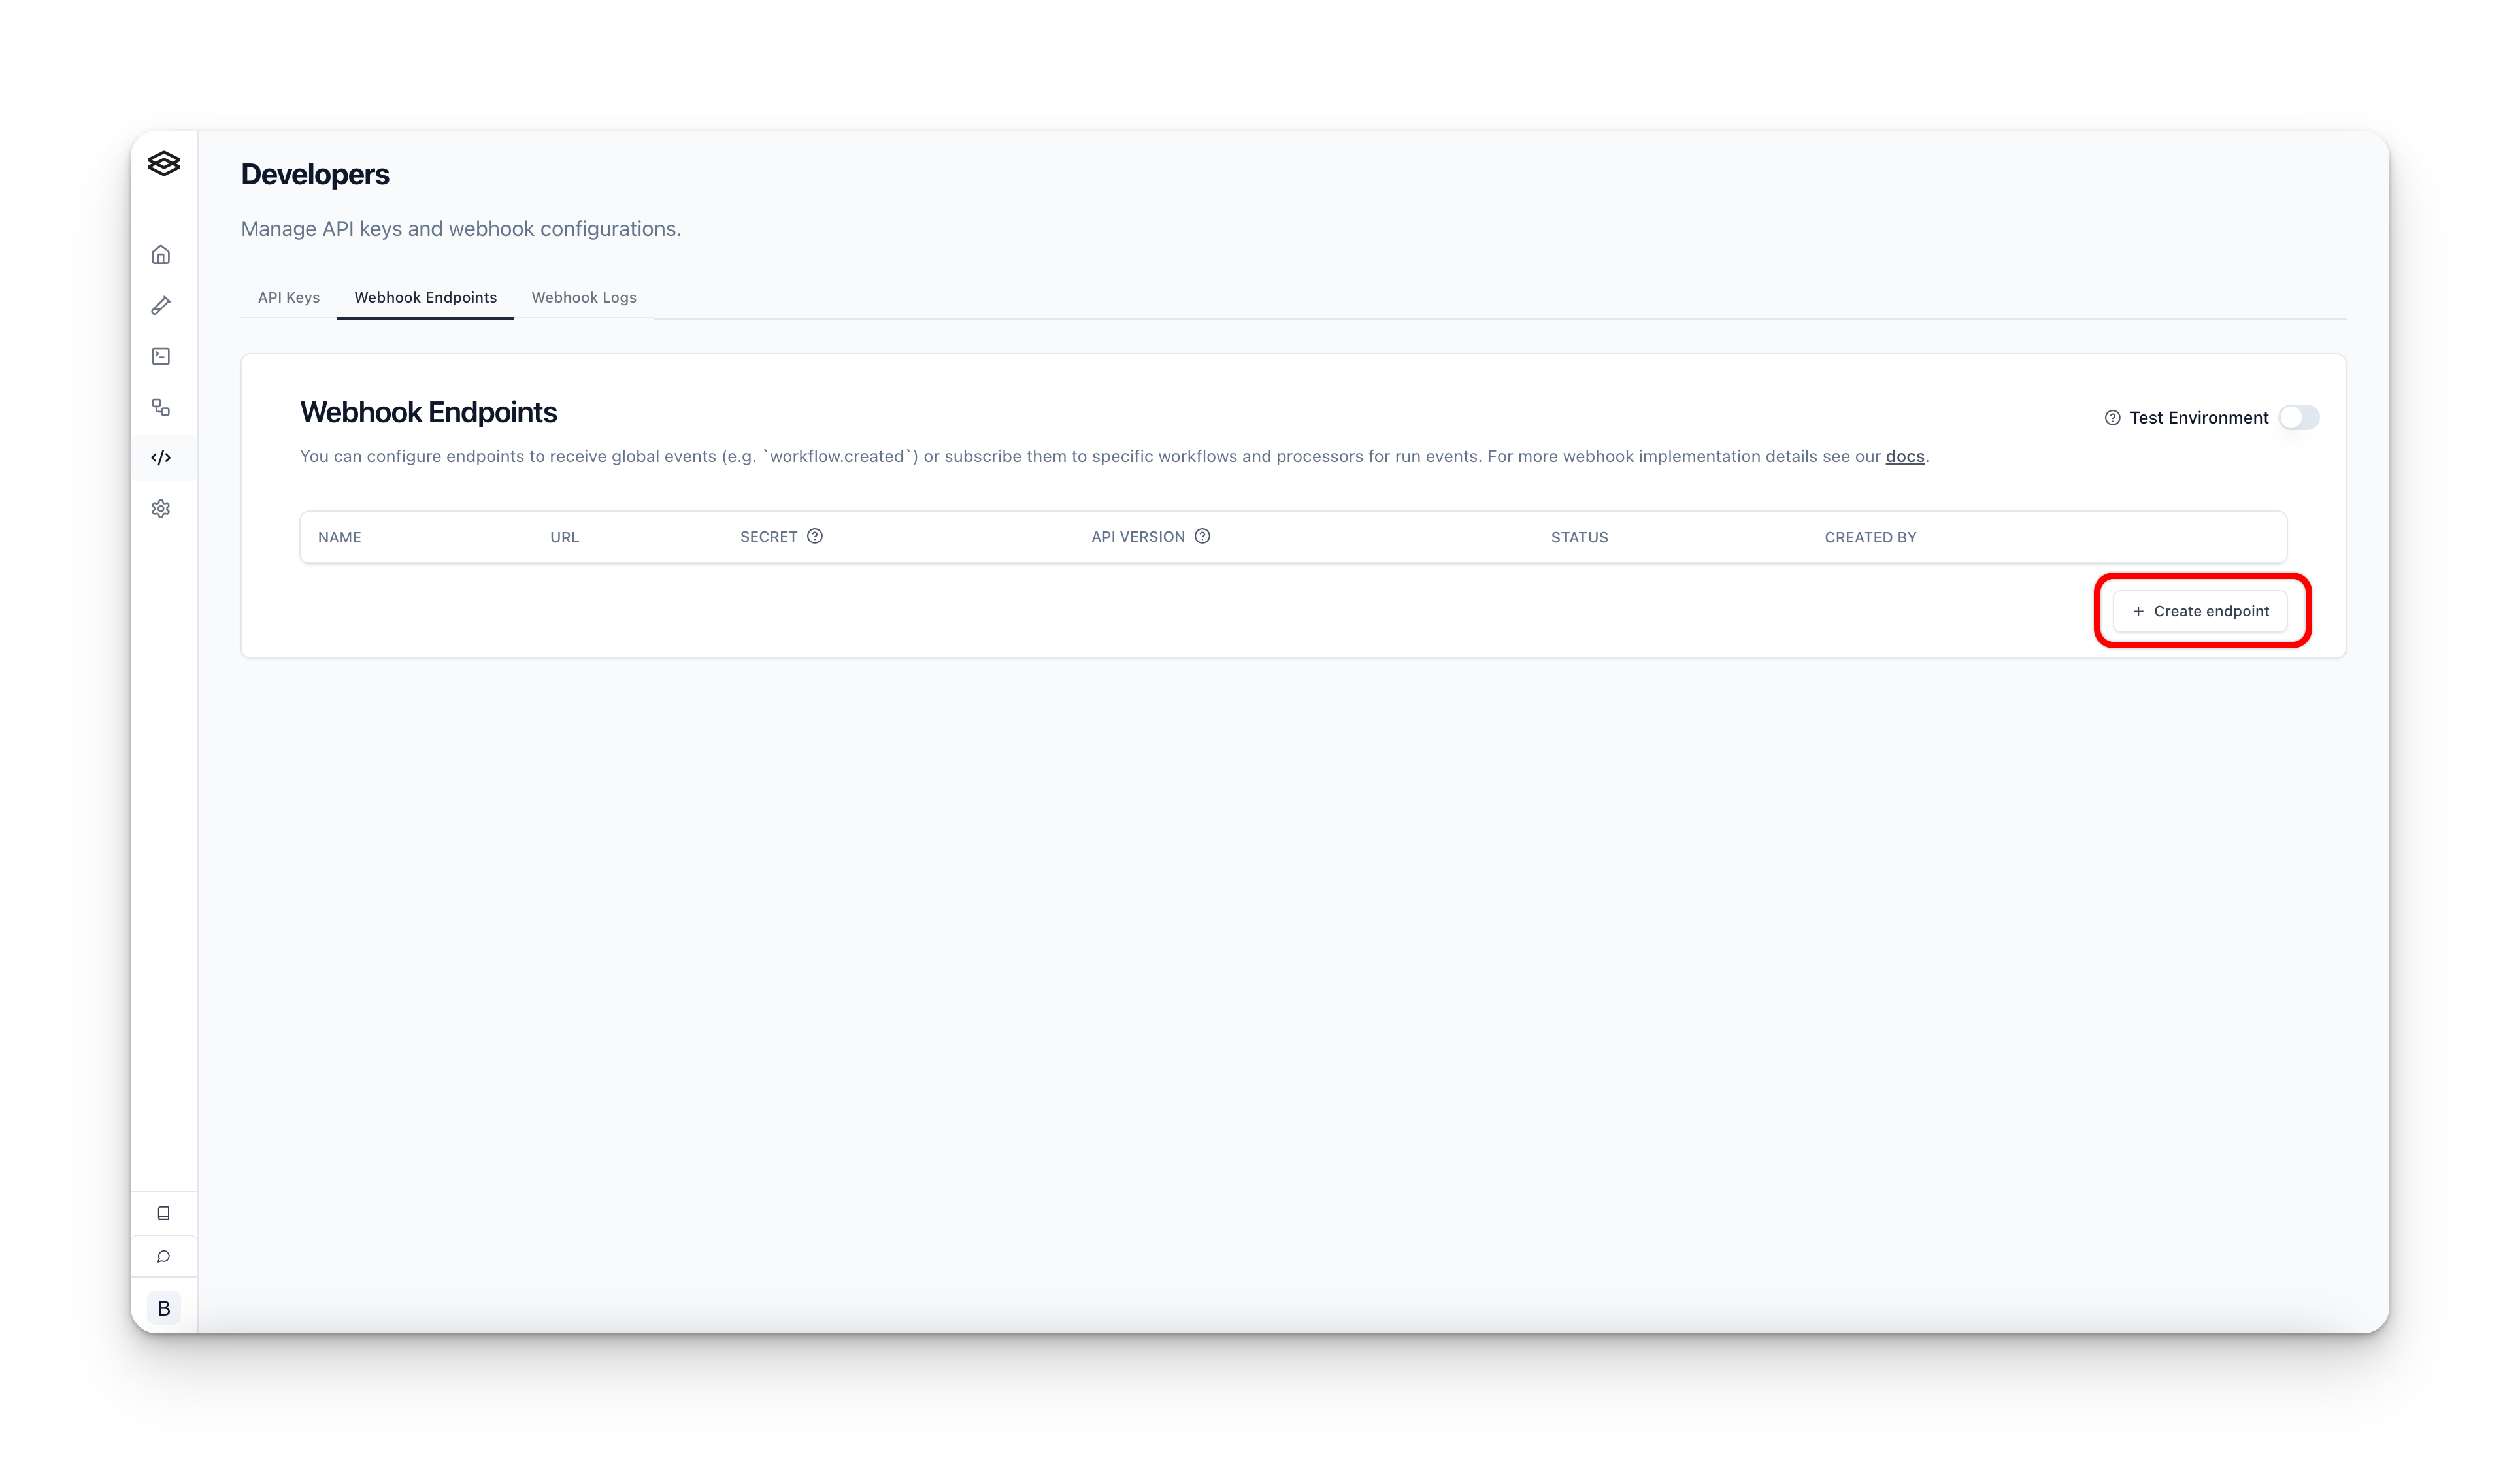
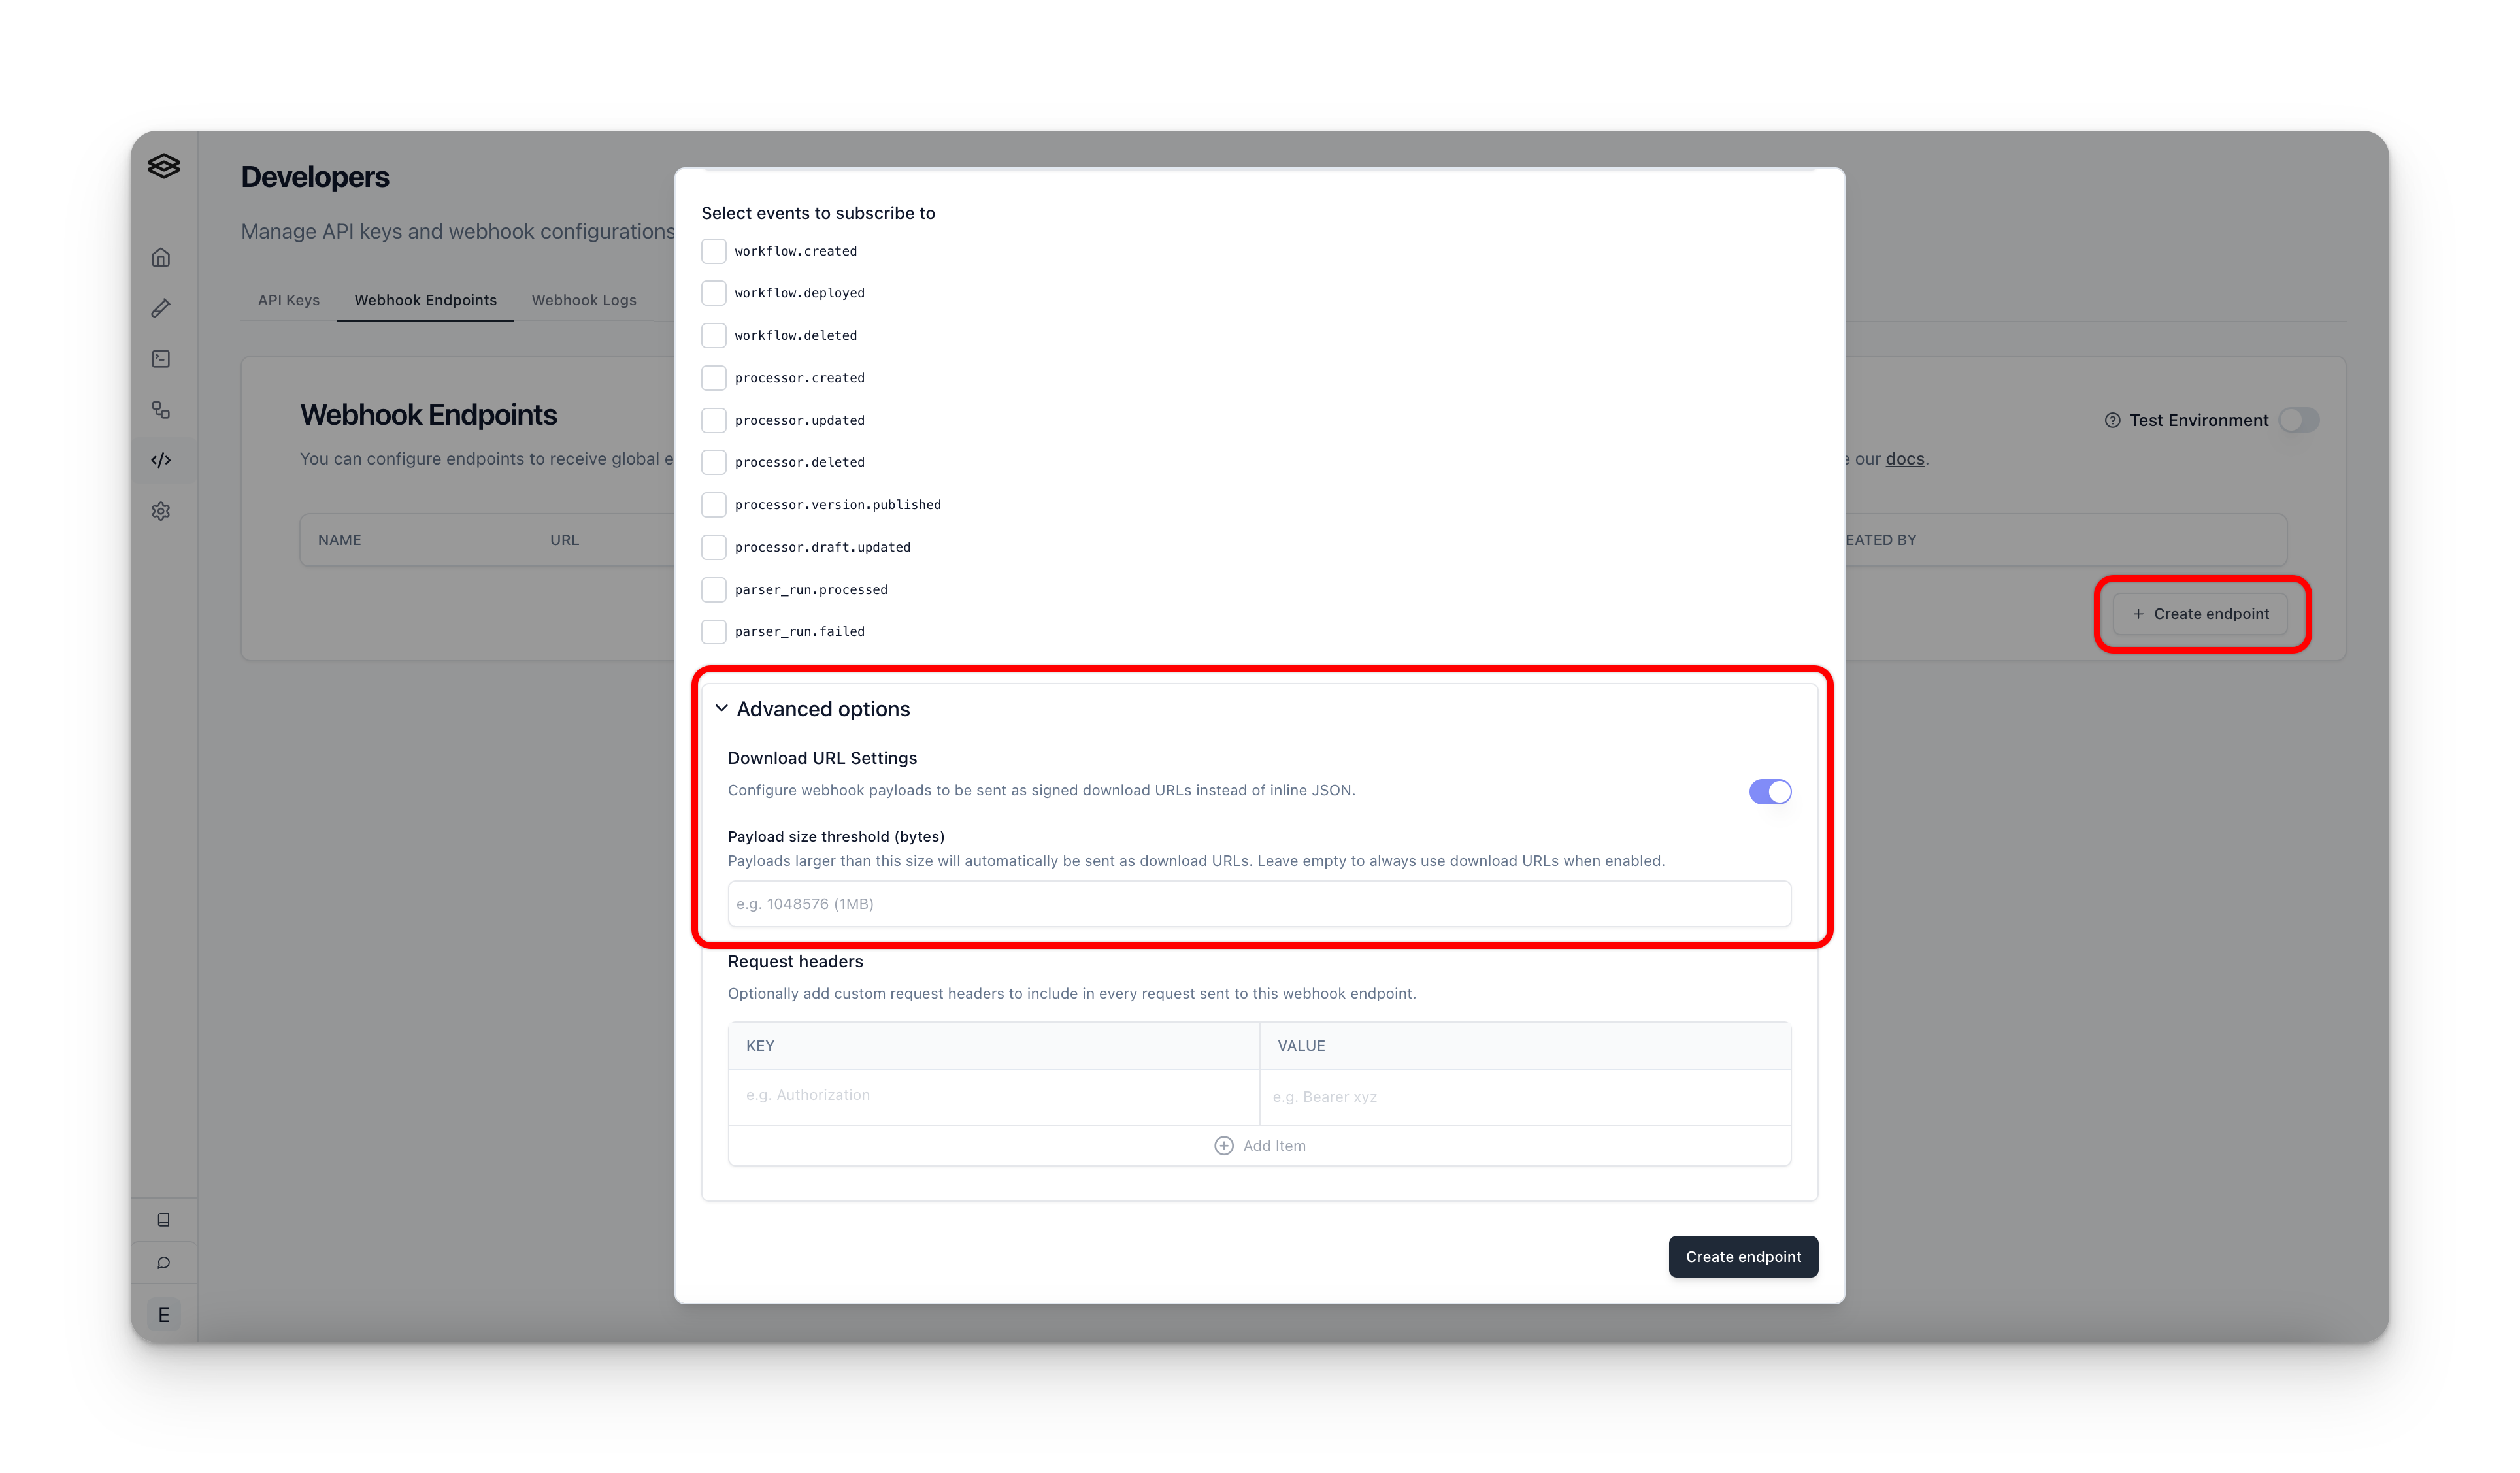
To set up a webhook, create one in the “Developers” tab on the sidebar, under the “Webhook endpoints” section.
Subscribe to global events
When creating a webhook endpoint, you can subscribe to the GLOBAL event types. These events are not associated with a specific workflow or processor and are global to your workspace.
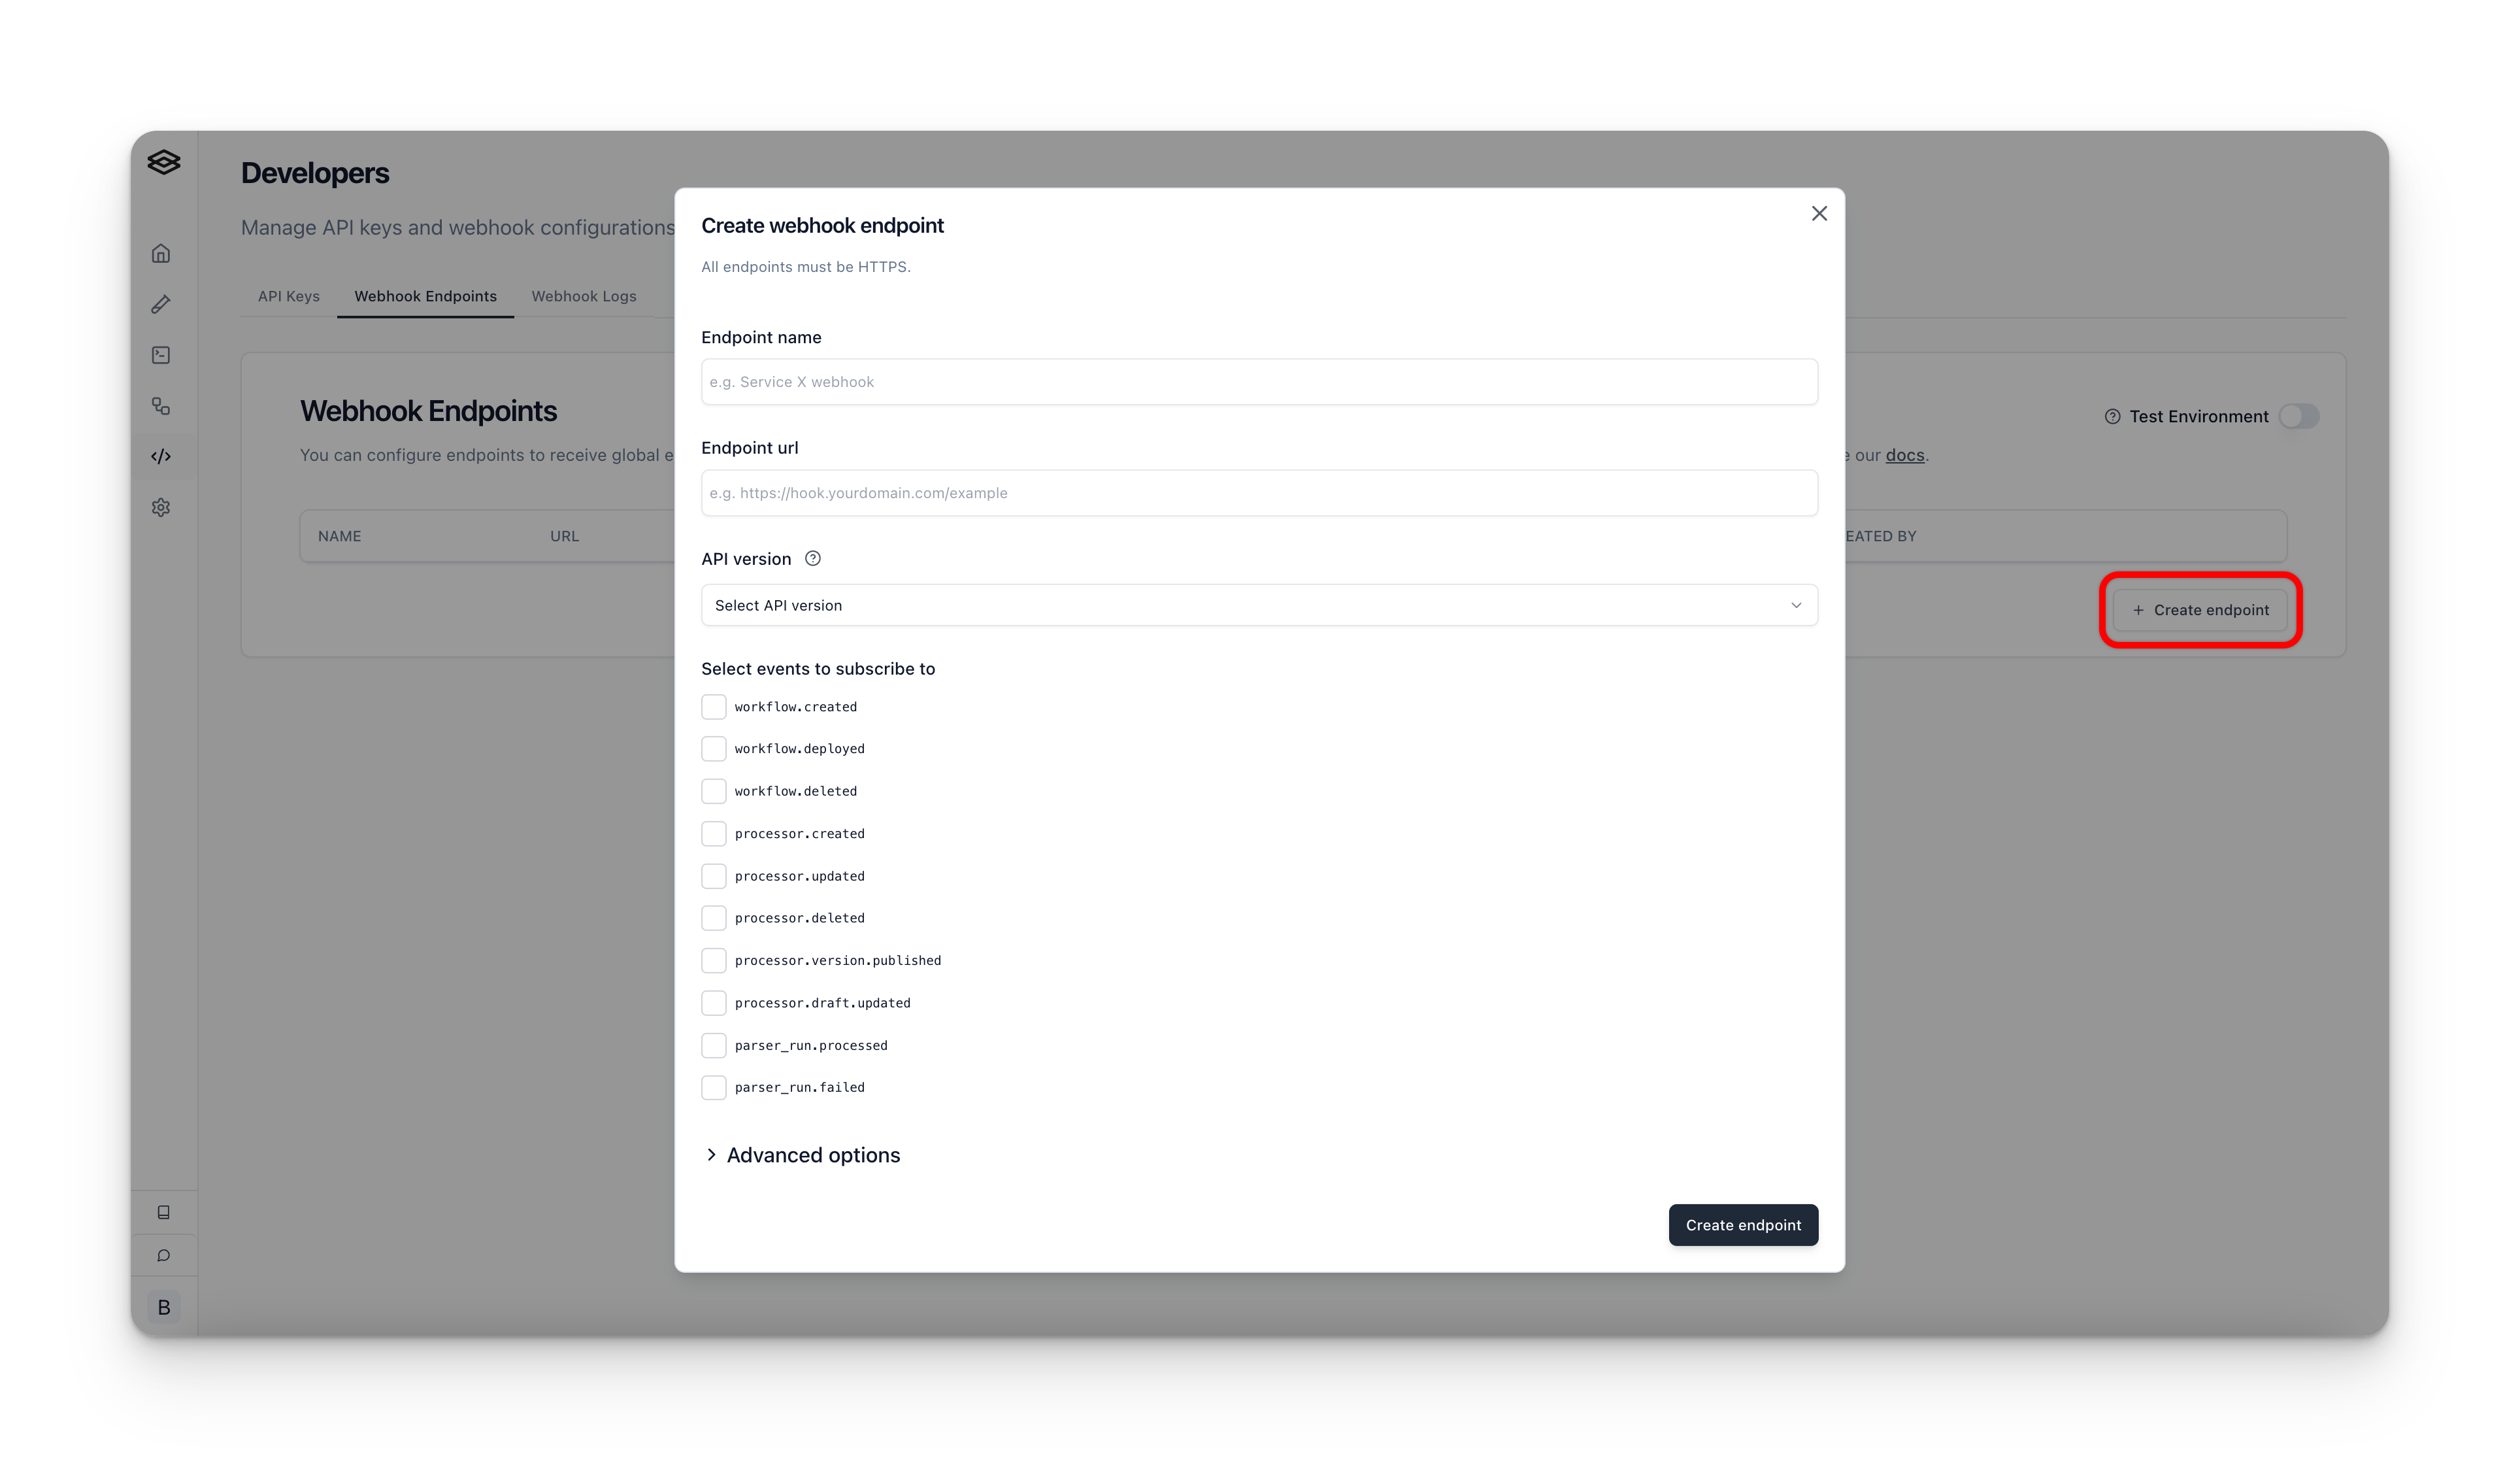
See the Events section for more details on the different event types you can subscribe to.
Workflow-specific subscriptions
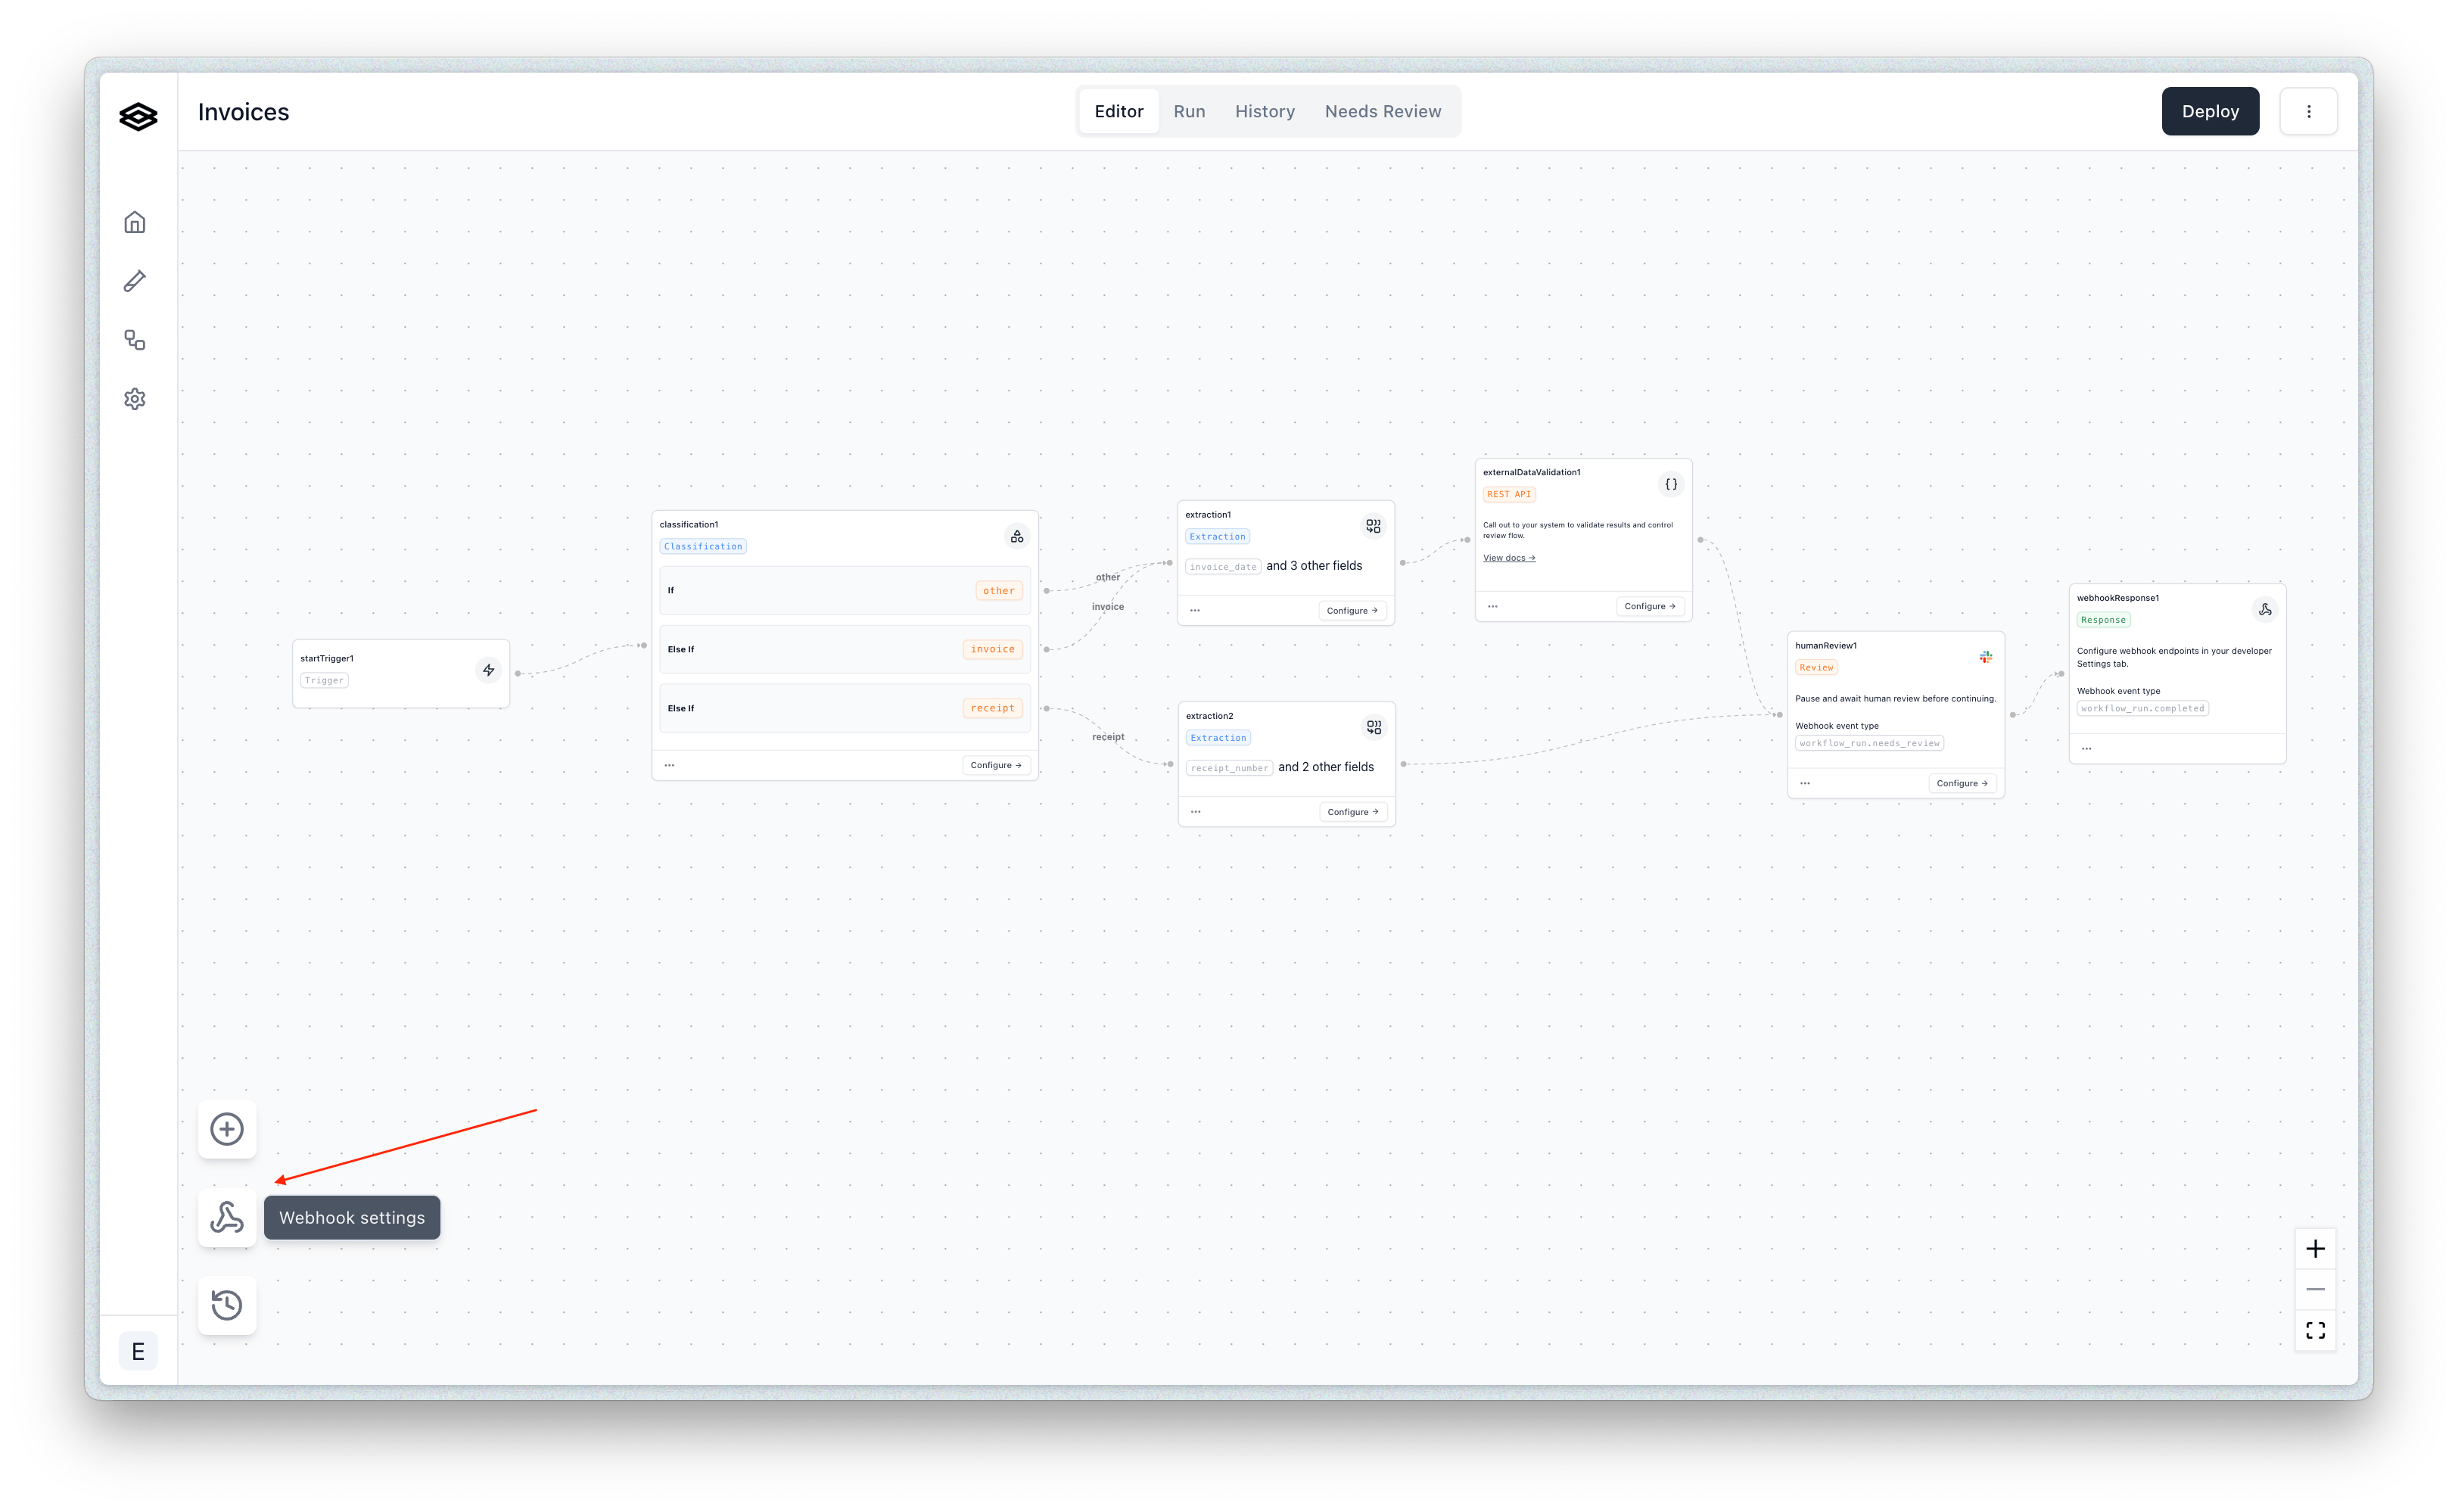
After you have created one or more webhook endpoints from the “Developer” tab, you can subscribe to events for specific workflows by navigating to the desired workflow(s) and opening the “Webhook Subscriptions” menu.
Then you can create new subscriptions for the desired endpoints and event types.
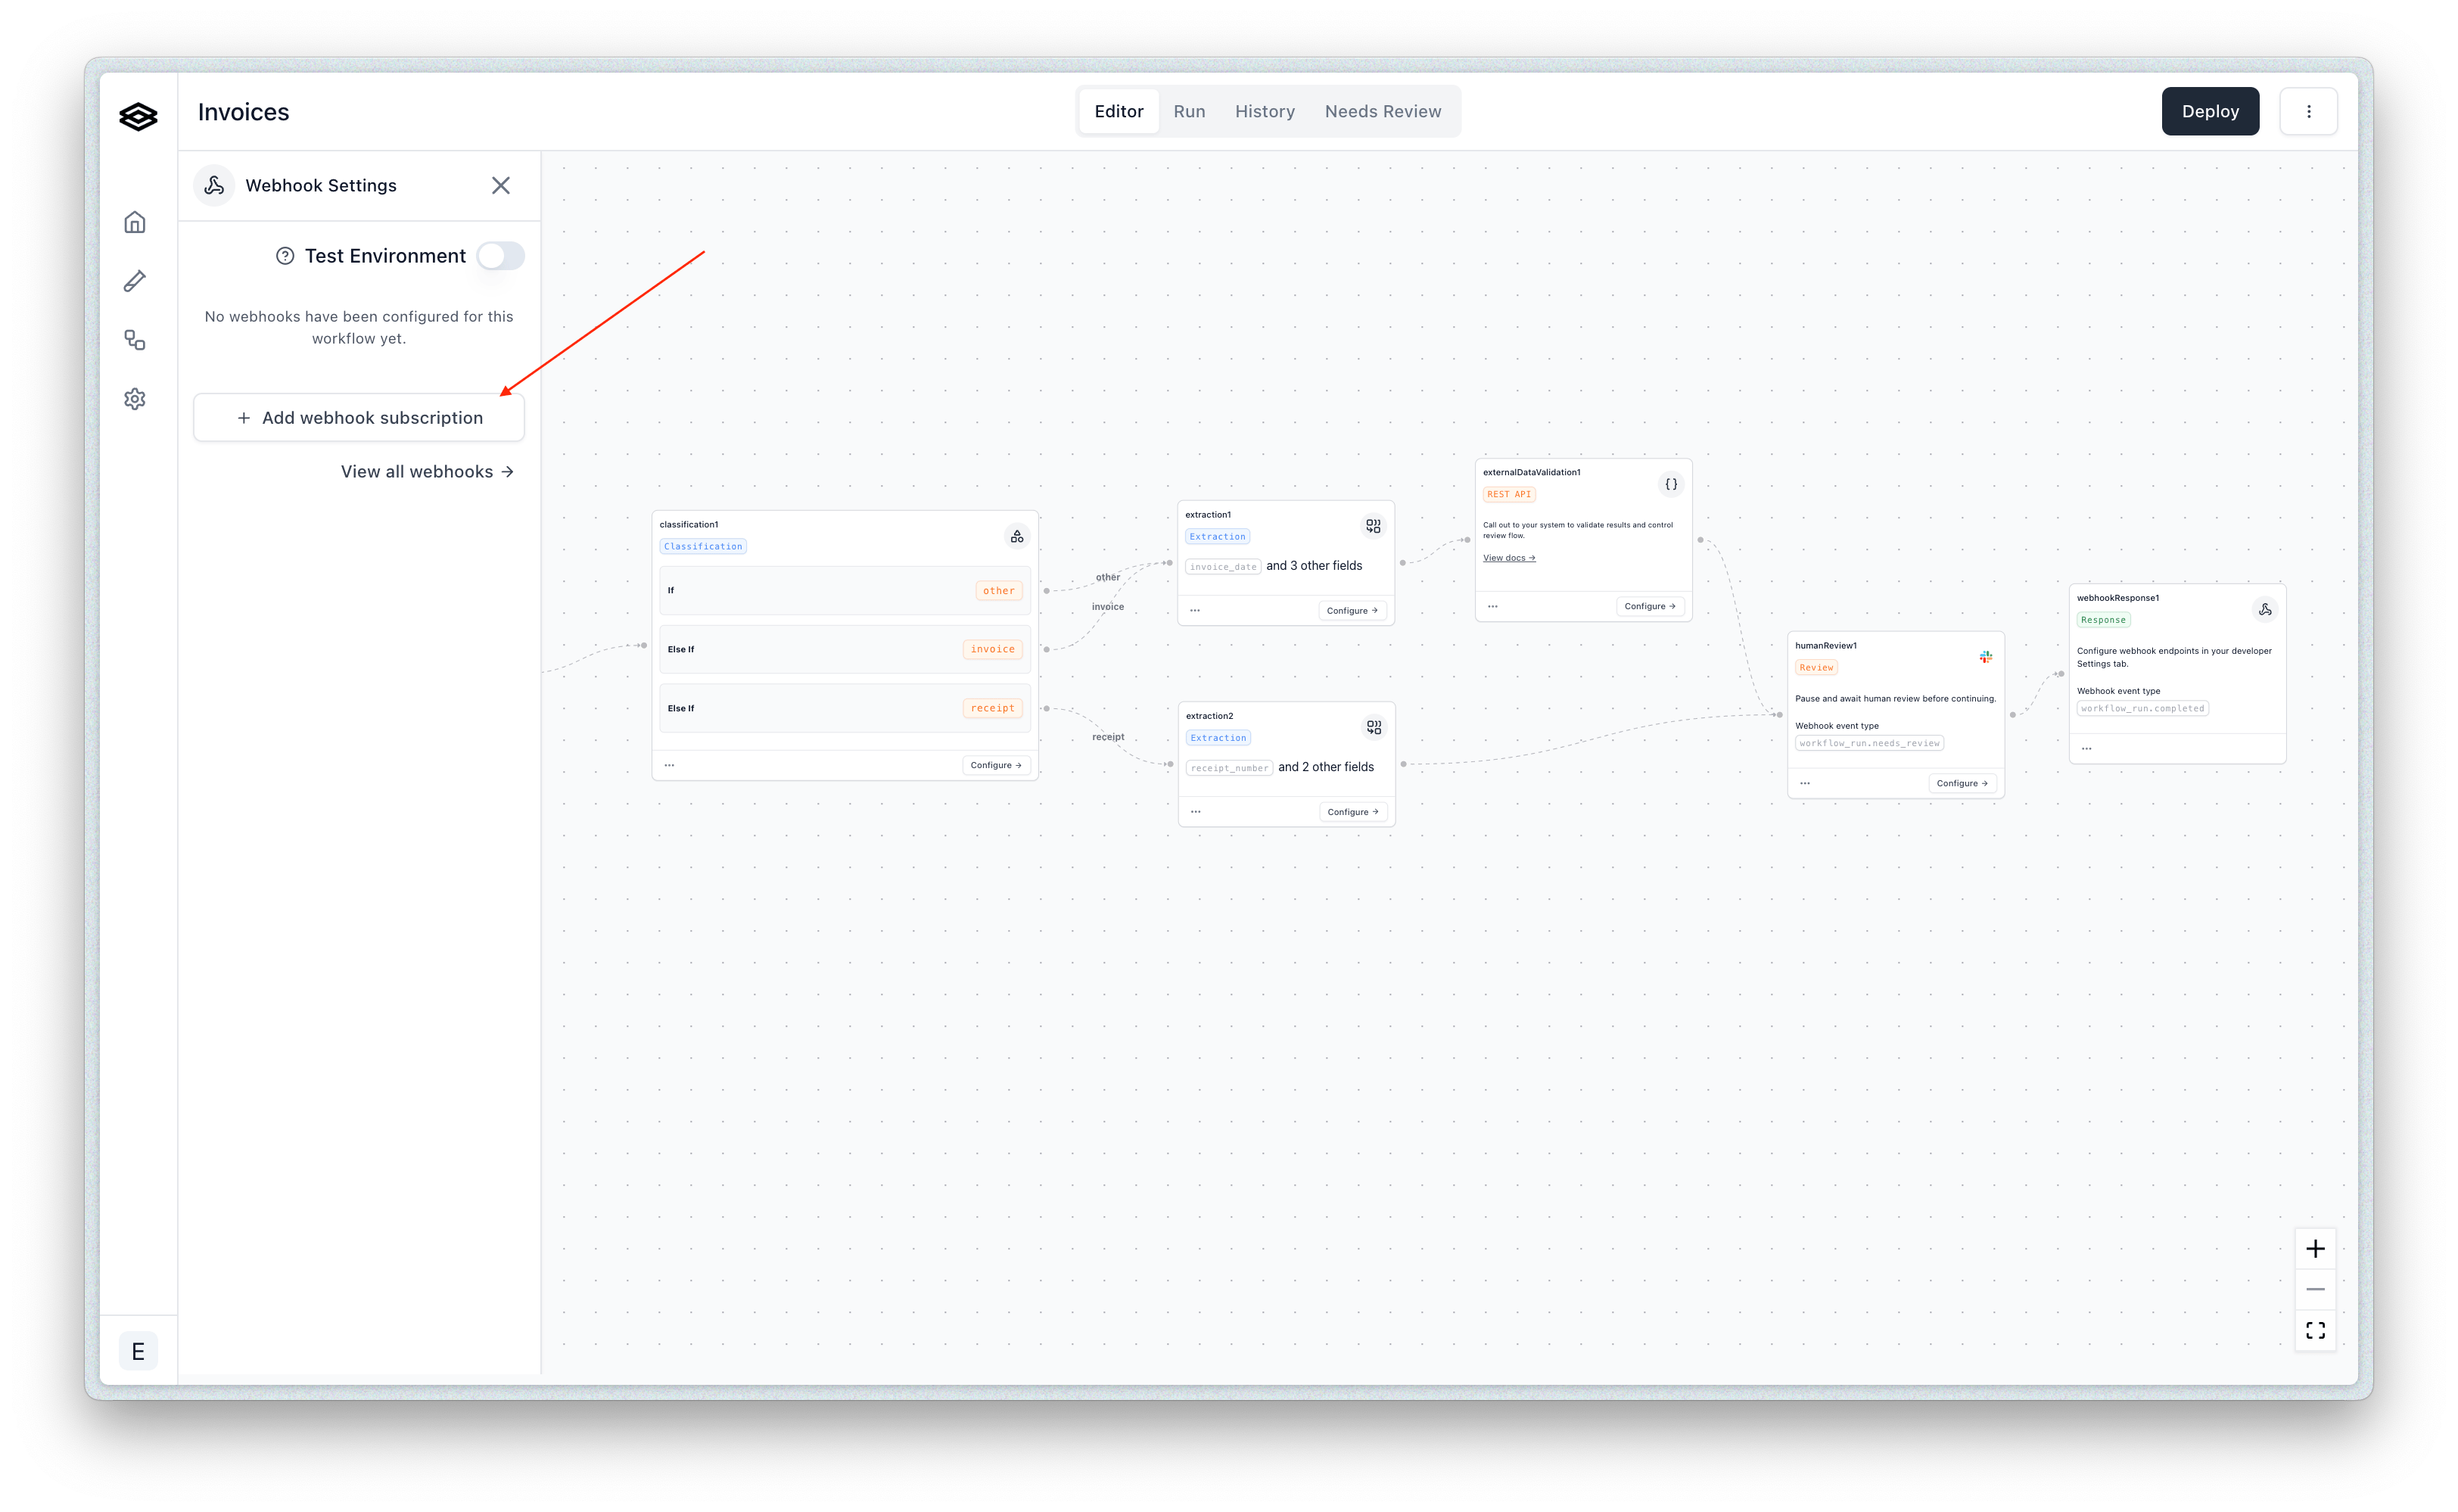

Once subscribed, you will start to receive events to the specified webhook endpoint based on the selected event types each time you run a file(s) through that workflow.
See the Events section for more details on the different event types you can subscribe to and the shape of the payload for each event type.
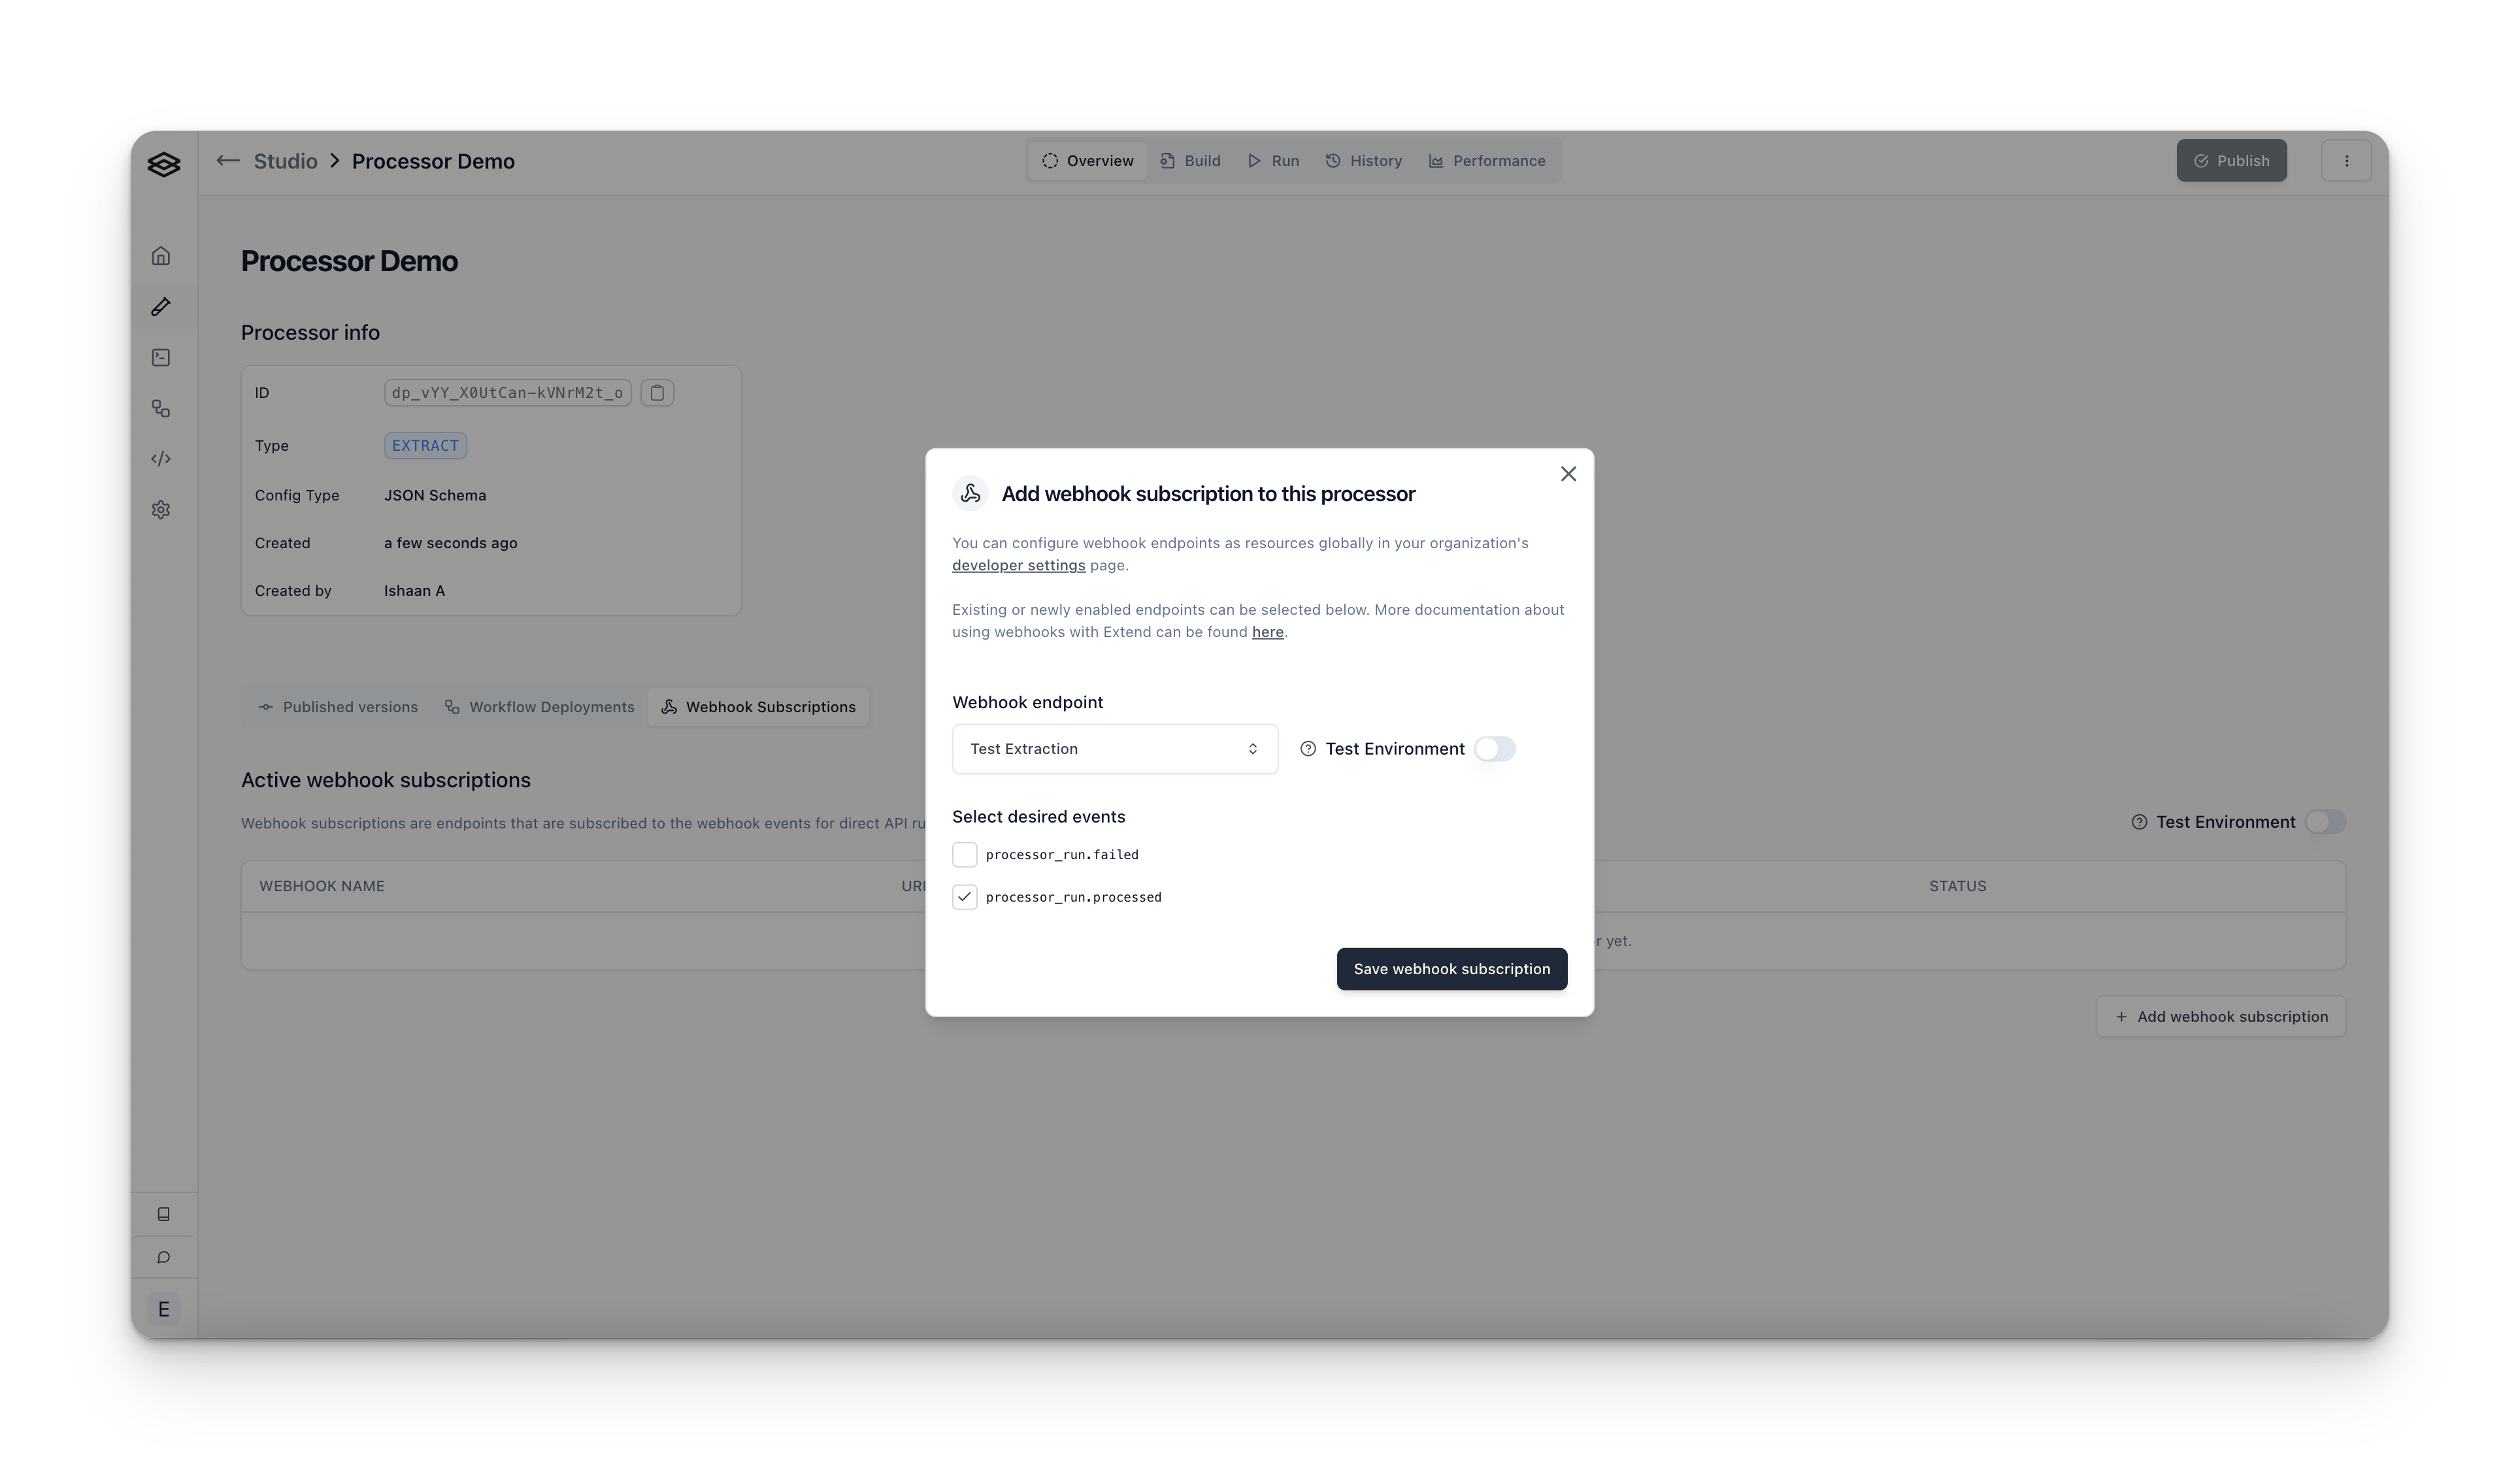
Processor run-specific subscriptions
You can also subscribe to events for specific processor runs. This is necessary if you are running processors directly and not via a workflow.
To start, navigate to the “Overview” tab of the given processor in Studio, click “Webhook Subscriptions”, and then click the “Add webhook subscription” button.

Next, you can select the desired event types you would like to subscribe to and assign the webhook endpoint you would like to receive events at.
Webhook delivery format
We support two delivery formats for webhooks:
- JSON: This is the default and most common format. It is a simple JSON object with the event data in the body.
- Signed Download URL: This is a signed URL that allows you to download the event data as a file. This is useful for scenarios where the webhook event payload is too large to fit in the body of the request, or you have payload size constraints on your webhook endpoint.
We also provide the option to send all payloads as a signed download URL over a certain size threshold, which can be configured in bytes when creating/updating a webhook endpoint.
The signed download URL has a one hour expiration time. When manually re-trying a webhook request, a new URL will be generated each time, and when viewing the webhook history for events sent as a URL, a new URL is generated for viewing.
To configure the delivery format, you can select the desired format in the “Advanced options” dropdown when creating/updating a webhook endpoint.
Configure webhooks with the API
Everything you can do in the dashboard you can also do programmatically. This is the path to reach for when you provision webhooks per customer or environment, manage them in infrastructure-as-code, or let an agent wire up its own event delivery.
Create an endpoint
Creating an endpoint registers a URL and sets its global enabledEvents. The response includes a signingSecret — it is returned only once, so store it securely. You’ll need it to verify deliveries.
Pass an empty enabledEvents array to create an endpoint with no global events — useful when you only plan to route specific resources to it via subscriptions.
Subscribe to a specific resource
To receive events for a single resource, create a subscription against an existing endpoint. Set the resourceType (extractor, classifier, splitter, or workflow), the resourceId, and the enabledEvents that are valid for that resource type. If a subscription already exists for the same endpoint and resource, it is updated rather than duplicated.
The valid enabledEvents for a subscription depend on its resourceType:
Manage endpoints and subscriptions
Both resources support the full set of list, retrieve, update, and delete operations. A few things to know:
- Updates are partial — only the fields you send are changed. An endpoint’s
apiVersioncannot be changed after creation. - Deleting an endpoint also deletes all of its subscriptions, and is permanent.
- Filtering — list subscriptions by
webhookEndpointIdto see everything an endpoint listens for, or byresourceIdto see every endpoint a resource notifies.
See the API reference for the full schemas and every operation: Create Webhook Endpoint and Create Webhook Subscription.
Prefer the command line? The Extend CLI wraps these endpoints with extend webhooks endpoints, extend webhooks subscriptions, and extend webhooks verify.
Verifying webhook requests
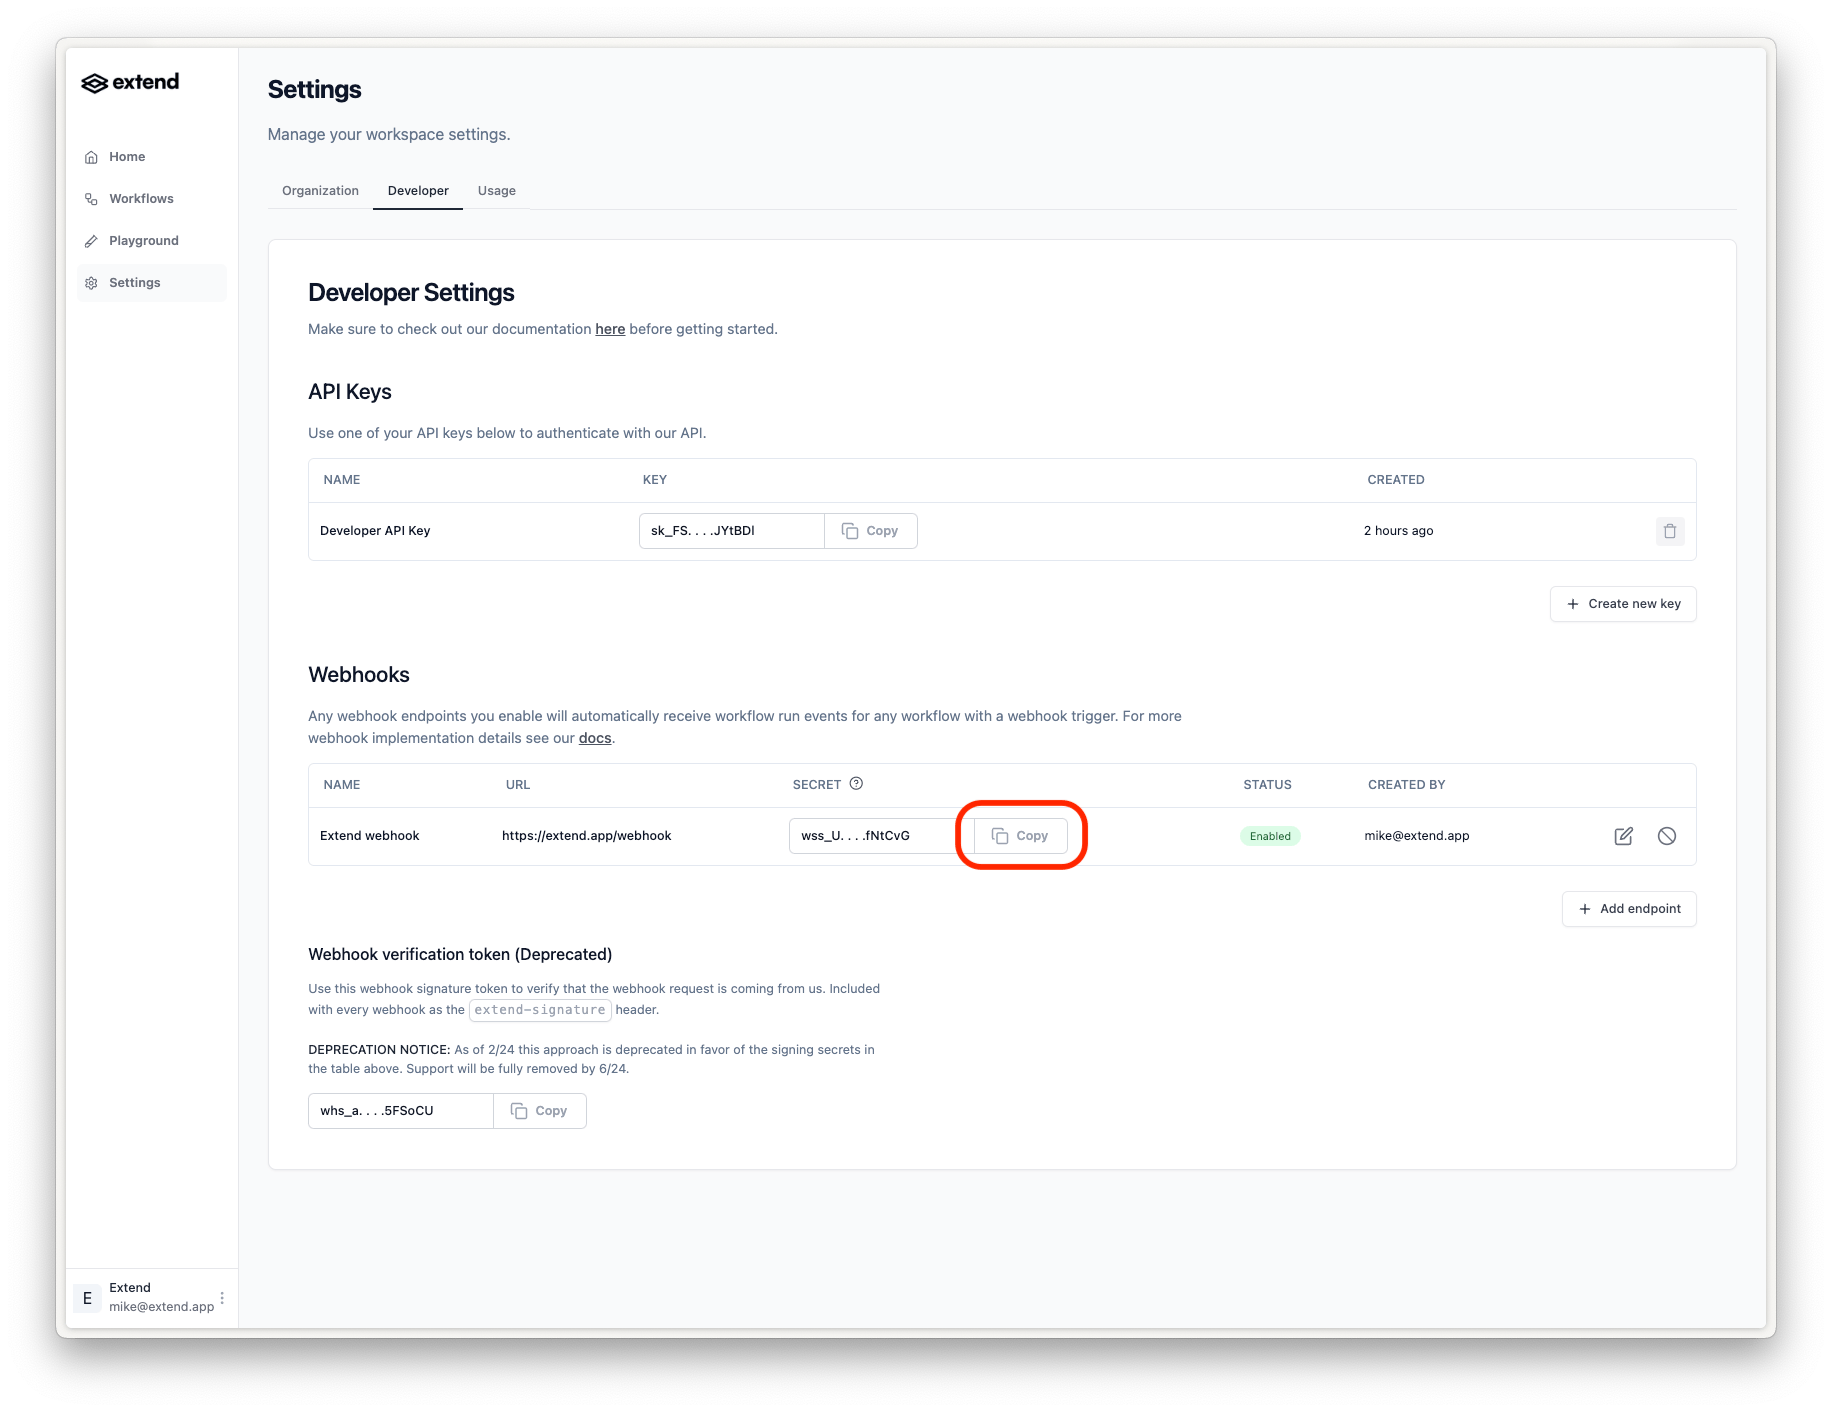
Extend will sign each webhook request using a secret unique to the webhook. You can use this signature along with the timestamp to verify that the request is coming from Extend as well as protect against replay attacks.
Using the SDK (Recommended)
The easiest way to verify webhook requests is using the SDK’s built-in helper methods. These handle signature verification, timestamp validation, and event parsing automatically.
The Go SDK does not include a webhook verification helper. Go users should verify the signature manually — see Manual Verification below.
The signing secret can be found in the webhooks table under the “Developer” tab:
Handling Signed URL Payloads
For large payloads, webhooks may be delivered via a signed URL instead of inline. To handle these:
Manual Verification
If you’re not using the SDK, you can verify webhook signatures manually:
- Retrieve the timestamp of the request from
x-extend-request-timestamp, the body of the request, and the signing secret associated with the webhook. - Concatenate the timestamp and request body using the following format:
v0:${timestamp}:${requestBody} - Compute a HMAC 256 digest on the resulting string using the signing secret as the key.
- Compare this digest with the signature provided in
x-extend-request-signature. If they are equal, then the request is verified to be from Extend.